
Last Updated: October 25, 2026
Quick Summary
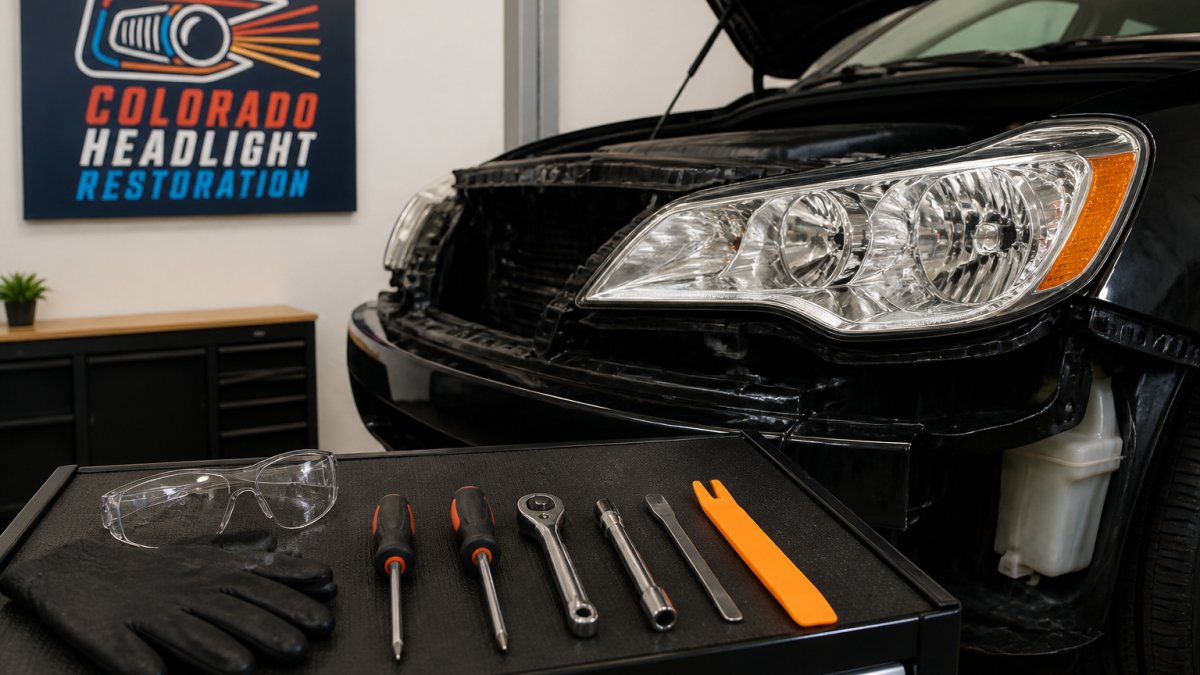
DIY headlight replacement needs a screwdriver set, ratchet and socket set, needle-nose pliers, a trim removal tool, and a clean microfiber cloth. For safety, let the bulbs cool, disconnect the negative battery terminal, and wear gloves and protective eyewear. Never touch the glass with bare fingers, and reconnect the battery last before testing.
- Confirm the bulb type and access method in your owner's manual before buying anything.
- Skip power tools, since an impact driver can strip plastic threads in seconds.
- Wait several minutes after shutdown before unplugging HID or LED connectors.
- Park facing a wall about 25 feet away to check beam alignment after installation.
- Skip DIY if the housing is cracked, the connector is melted, or the lens is yellowed.
Table of Contents
- Tools Needed to Change a Headlight Bulb
- Headlight Replacement Safety Precautions
- How to Replace a Headlight Bulb
- How to Replace a Headlight Assembly
- Bulb Compatibility and Technology Differences
- Troubleshooting and Post-Replacement Checks
- When DIY Replacement Is Not Advisable
- Book a Professional Restoration Instead
- Frequently Asked Questions
Tools Needed to Change a Headlight Bulb
Changing a headlight bulb is one of the few car repairs most drivers can finish in under half an hour. This guide covers the DIY headlight replacement tools and safety tips that matter most.
The right setup is simple. You need a few hand tools, the correct replacement bulb, and a plan for handling glass and electricity safely.
Confirm Requirements Before You Buy Anything
Start with the owner's manual. It lists the bulb type for low beam, high beam, and any fog or turn-signal bulbs, plus the access method (from the engine bay, through a wheel-arch liner, or by removing the assembly).
A common pattern is that the manual tells you the bulb number but not the fastener type. Before disassembly, look behind the housing with a flashlight and note whether you see Phillips screws, Torx, or hex-head bolts.
The Core Hand Tools
Most jobs need only a small kit:
- Screwdriver set (Phillips and flathead) for access panels and trim
- Ratchet and socket set for assembly bolts
- Needle-nose pliers for retaining clips and spring wires
Skip the power tools. A careless impact driver can strip plastic threads in seconds, and plastic trim clips crack easily in cold weather.
Vehicle-Specific Tools and Preparation
Some vehicles need a little more. Check your owner's manual for the bulb type and access method before you buy anything.
- Torx or hex bits if your housing uses security fasteners
- A step stool for trucks and SUVs with high engine bays
- A flashlight or headlamp for tight spaces
One tip: lay out every tool before you open the hood. Half the frustration in DIY headlight replacement comes from hunting for a socket you dropped.
Optional Tools That Earn Their Keep
A few extras are not required but make the job easier on older vehicles:
- A magnetic pickup tool for dropped screws in the engine bay
- A trim pry bar when bumper or grille removal is called for
- A small mirror to see the back of a housing you cannot reach by feel
What You Do Not Need
You do not need a diagnostic scanner for a basic bulb swap, and you do not need to remove the battery. Disconnecting the negative terminal is enough. Save the specialty tools for the cases where the manual or a repair guide calls for them.
Here is the core tool kit most headlight bulb jobs call for, plus the extras worth adding for certain vehicles.
| Tool | Best for | Note |
|---|---|---|
| Screwdriver set (Phillips and flathead) | Access panels and trim | Part of the core kit |
| Ratchet and socket set | Assembly bolts | Part of the core kit |
| Needle-nose pliers | Retaining clips and spring wires | Part of the core kit |
| Trim removal tool | Popping plastic fasteners | Prevents cracking them |
| Clean microfiber cloth | Handling the new bulb | Part of the core kit |
| Torx or hex bits | Housings with security fasteners | Vehicle-specific |
| Torque wrench | Assembly bolts with a specified value | Only if the manual specifies a value |
| Dielectric grease | Connector terminals with light corrosion | Vehicle-specific |
Headlight Replacement Safety Precautions
Safety comes down to two things: protecting yourself and protecting the bulb. Get both right and the job stays simple. The sequence below is the one most technicians follow, and it is worth walking through in order rather than improvising.
Step 1: Shut Down and Cool Down
Park on a level surface, set the parking brake, and turn the ignition off. Give the headlights a few minutes to cool before you reach behind the housing. Halogen bulbs run hot enough to burn skin, and the housing and nearby engine components can stay warm long after the switch is off.
Step 2: Disconnect the Battery
Always disconnect the negative battery terminal before touching any electrical connector. A headlight circuit can still carry current with the switch off. Use a wrench to loosen the negative clamp and tuck the cable aside so it cannot spring back and contact the post. This one step prevents shorts, blown fuses, and painful surprises.
Step 3: Protect Hands and Eyes
Halogen bulbs run hot and hold pressure. Wear safety gloves and protective eyewear in case a bulb shatters.
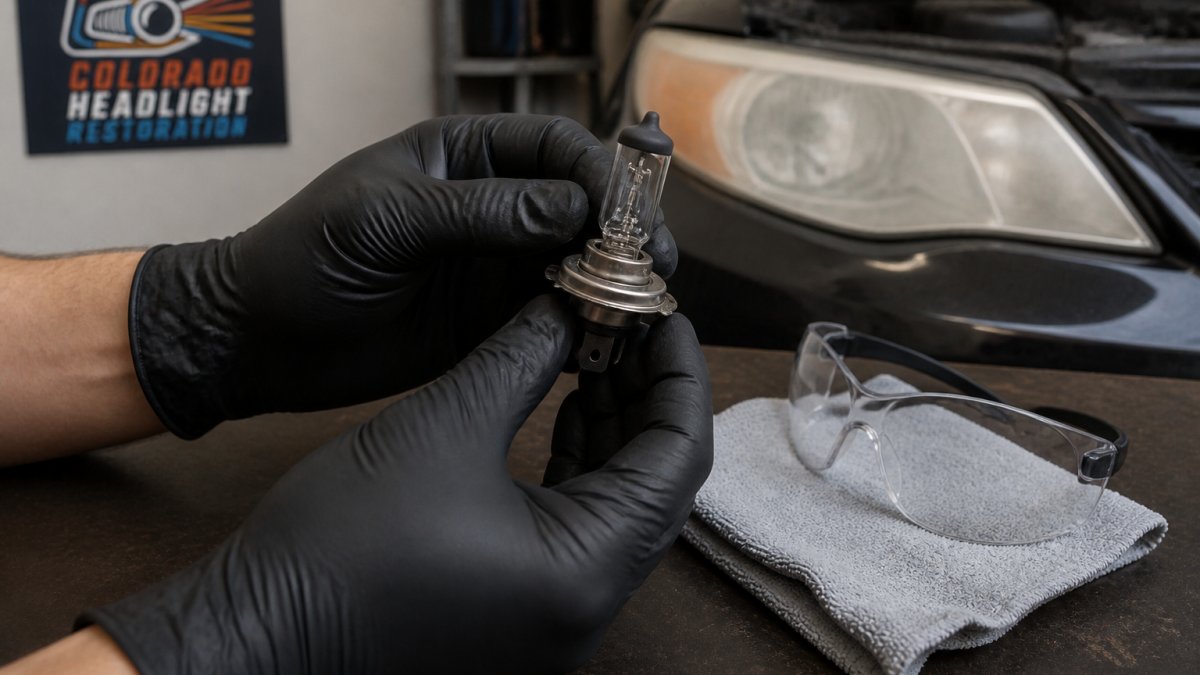
Never touch the glass with bare fingers. Skin oils create hot spots that shorten bulb life and can crack the glass. Hold new bulbs by the plastic base only.
Step 4: Handle Connectors and Clips Carefully
Plastic connectors and retaining clips get brittle with age and heat. Release the locking tab before pulling a connector, and use needle-nose pliers on spring clips rather than yanking by hand. If a connector is stuck, wiggle it gently rather than pulling on the wires. Broken clips are one of the most common reasons a dust cover or access panel ends up loose afterward.
Step 5: Reconnect and Verify
Reconnect the negative terminal last, after the bulb, connector, and dust cover are fully seated. Tighten the clamp snugly but do not overtighten, a stripped terminal clamp is its own repair. Then test low beam, high beam, and turn signals before you close the hood.
How to Replace a Headlight Bulb
The process is straightforward once you know the order. Follow these steps for a clean, safe headlight replacement.
Accessing the Headlight Assembly
Open the hood and find the back of the headlight housing. You'll usually reach it from inside the engine compartment.
- Disconnect the negative battery terminal.
- Remove any access panel or dust cover behind the housing.
- Unplug the electrical connector from the bulb.
- Release the retaining clip or twist lock that holds the bulb.
Some vehicles require removing the airbox or washer fluid neck. Take your time and avoid forcing plastic parts in cold weather.
Removing and Installing the Bulb
Pull the old bulb straight out by its base. Inspect the socket for corrosion or melted plastic before you install the new one.
Seat the replacement bulb firmly, then reattach the clip or twist lock. Reconnect the electrical connector until it clicks.
Test both low beam and high beam before you close the hood.
How to Replace a Headlight Assembly
Full assembly replacement takes more work. You'll typically remove the front bumper cover or grille to reach the mounting bolts.
- Disconnect the battery first.
- Remove fasteners along the bumper and wheel arch.
- Unbolt the assembly and unplug all connectors.
- Transfer bulbs and modules to the new housing.
This job is doable for a confident DIYer, but it takes patience. Watch out: broken bumper clips are the most common mistake, and they leave panels loose at highway speed.
Bulb Compatibility and Technology Differences
The wrong bulb wastes money and can damage the housing. Match the bulb type to your vehicle's spec, not to what looks brightest online.
Halogen bulbs are cheap and plug-and-play. LED bulbs last longer and draw less power, but cheap conversions can scatter light and glare oncoming drivers. HID systems run at high voltage and need extra care.
For a deeper look at how bulb types and housing options compare, see our guide on OEM vs aftermarket headlights. Drivers facing steep mountain roads can also check which bulbs perform best in demanding conditions.
Troubleshooting and Post-Replacement Checks
A new bulb that won't light usually points to a simple fix. Work through these checks before you assume the bulb is bad:
- Confirm the connector is fully seated
- Check the fuse for that circuit
- Swap the bulb to the other side to test it
- Inspect the socket for corrosion
Checking Beam Alignment After Installation
Park facing a wall about 25 feet away and turn on the low beams. Both light patterns should sit at the same height and point slightly down. If one beam aims high or sideways, the bulb isn't seated correctly. Fix it before you drive, since misaligned lights blind other drivers and fail inspection.
When DIY Replacement Is Not Advisable
Some jobs are better left to a pro. Skip the DIY route if:
- The housing is cracked or full of moisture
- The connector is melted or corroded
- Your vehicle needs bumper removal and you lack the tools
- The lens is yellowed rather than the bulb burned out
That last one matters. A cloudy lens blocks light no matter how new the bulb is. If your lenses look hazy, learn why headlights turn yellow and what actually fixes it.
Book a Professional Restoration Instead
If your lights are dim because of cloudy lenses, a new bulb won't solve it. Our mobile service restores oxidized headlights to OEM clarity at your home or office, usually in 30 to 60 minutes.
You can book headlight restoration and skip the DIY guesswork entirely. Want to know what to expect first? Our guide on mobile restoration results walks through how long the finish lasts.
Frequently Asked Questions
What tools do I need to replace my headlights?
Most headlight replacement jobs need a basic set: a screwdriver, a ratchet and socket set, and needle-nose pliers for tight retaining clips. Add nitrile gloves and safety glasses before you start. Some vehicles also require a torx or hex bit, and a trim removal tool helps if an access panel sits under the hood or wheel well. Check your owner's manual for the exact bulb type and any vehicle-specific fasteners so you have everything on hand before removing the old bulb.
Why should you wear gloves when changing a headlight bulb?
The oil from your fingers can shorten bulb life or cause a hot spot that cracks the glass. Nitrile gloves keep the glass clean and protect your hands from sharp metal edges and old grease. If you touch the glass by accident, wipe it down with isopropyl alcohol and a lint-free cloth before installing. This one headlight replacement safety precaution costs almost nothing and prevents repeat jobs.
How do I know whether I need a new headlight bulb or a complete assembly?
If the lens is clear and only one beam is out, a replacement bulb is usually enough. If the lens is cloudy, cracked, or holds moisture, or if the housing is damaged from a minor collision, the whole headlight assembly may need replacing. Test the bulb in the opposite housing or check for voltage at the connector first. A quick inspection with the lights on will tell you whether the problem is the bulb, the wiring, or the housing itself.
How can I check that a new headlight is aimed correctly?
Park on level ground facing a wall about 25 feet away, then turn on the low beams. The top of each beam pattern should sit slightly below the height of the bulb center, and both beams should point straight ahead without crossing. Adjust using the aim screws on the housing if needed. If the beam looks uneven or too high after a headlight replacement, have the aim checked before driving at night.
Dim headlights are a safety problem, not just a cosmetic one. If your lenses are cloudy, restoring them beats replacing bulbs that were never the issue. Get started with Colorado Headlight Restoration and see the road clearly again with mobile service, fast turnaround, and a finish backed for years.

Learn more about our headlight restoration in Denver, or see headlight restoration in Longmont.
Cloudy headlights? Get your price in 30 seconds.
Mobile service across the Denver metro. Most vehicles finished in 30–60 minutes, right in your driveway.