
Table of Contents
- Why Mobile Headlight Restoration Beats DIY Kits
- Signs Your Headlights Need Professional Restoration
- What the Mobile Restoration Process Includes
- How Long Does Headlight Restoration Last?
- Benefits of Ceramic UV Sealant for Headlights
- Headlight Restoration Cost vs. Replacement
- Book Your On-Site Appointment
- Frequently Asked Questions
Last Updated: September 9, 2026
Cloudy, yellowed headlights cut your nighttime visibility dramatically and age the look of any vehicle. If you have been searching for mobile headlight restoration near me, the goal is usually the same: get factory-clear lenses without paying dealership prices or losing a day to a shop visit. Professional, on-site service delivers exactly that, often in less time than it takes to watch a movie. This guide from Colorado Headlight Restoration explains what proper restoration involves, what it costs compared to replacement, and how to make the results last.
The biggest mistake most drivers make is reaching for an over-the-counter DIY kit first. Those kits appear to work for a few weeks, but the clarity fades quickly because they lack the durable protection that makes restoration last.
Why Mobile Headlight Restoration Beats DIY Kits
Most DIY headlight restoration kits fail because they only address surface oxidation (peer-reviewed research). They rely on a thin wipe-on coating that breaks down under UV exposure within weeks. The result is hazy lenses that look worse than before once the temporary layer wears off.
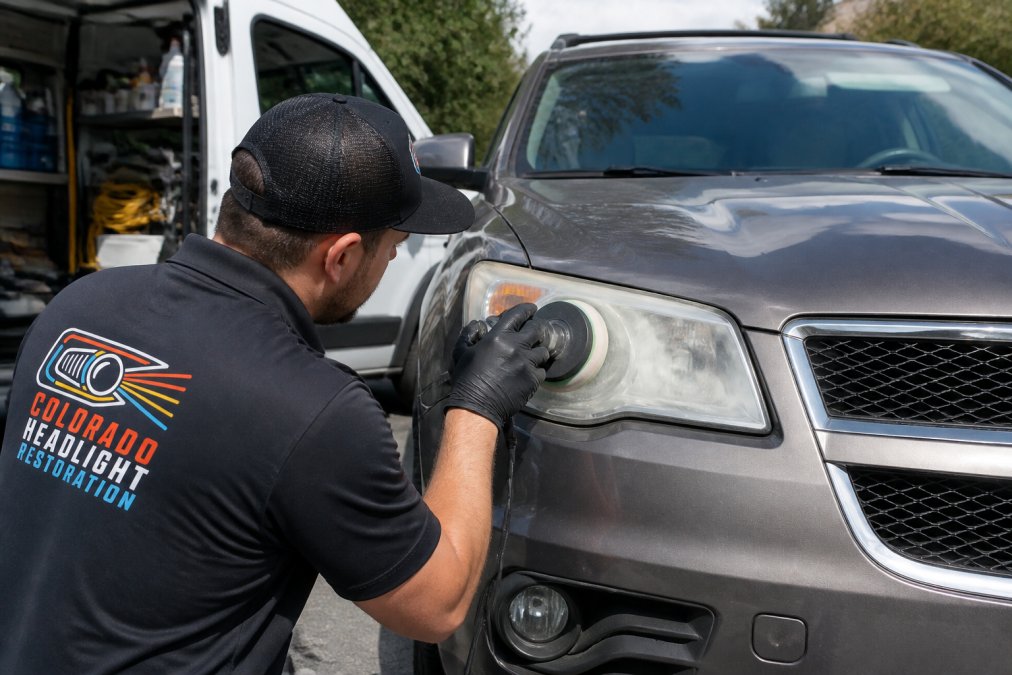
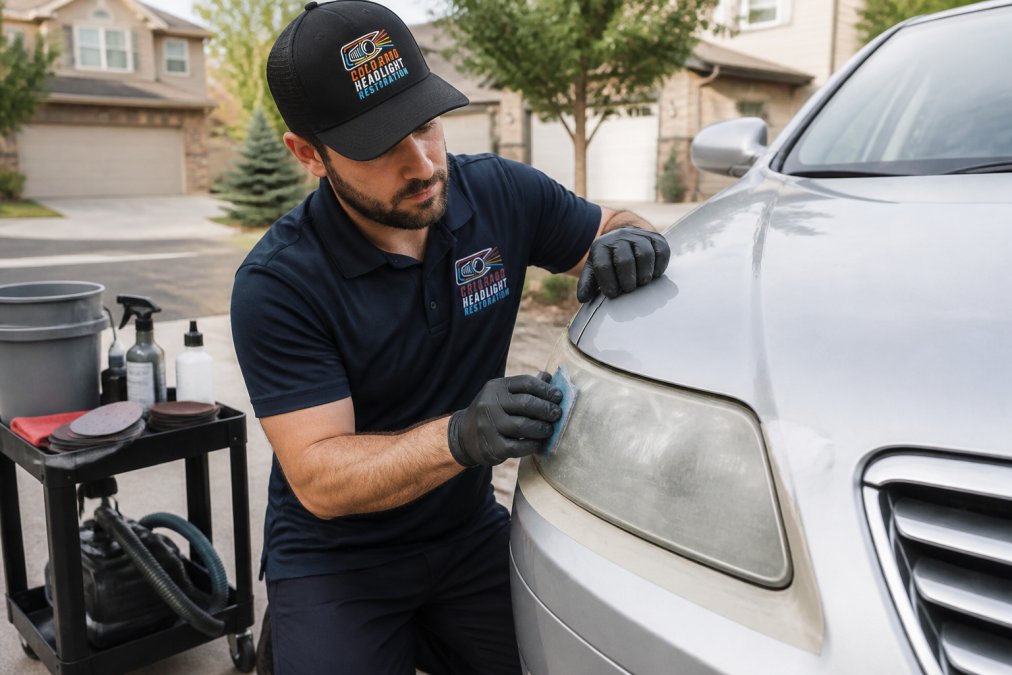
Professional mobile services use a multi-stage process: wet sanding with progressively finer grits, machine polishing to remove deep oxidation, and a protective sealant designed for long-term UV resistance. This is performed at your driveway. Polishing alone removes light haze; true restoration removes the degraded outer layer of the polycarbonate lens itself.
The convenience factor matters too. You do not lose your vehicle for half a day. The service comes to your home or office, and most vehicles are done in 30 to 60 minutes.
Signs Your Headlights Need Professional Restoration
Headlight lenses are made of polycarbonate plastic with a factory UV-protective coating. Over time, sun exposure, road grime, and small impacts degrade that coating. The first visible sign is a faint yellow tint that, left untreated, deepens into a cloudy, oxidized layer that blocks light output.
But not every cloudy headlight can be fixed by restoration. Before you book a service, run this two-minute diagnostic to determine whether your issue is external (on the lens surface) or internal (inside the assembly).
External damage, restoration will fix this
External damage is caused by UV radiation and abrasion attacking the outer layer of the polycarbonate lens. It is the most common issue and is fully correctable.
- Yellowing: A warm, amber tint across the lens surface indicates the factory UV coating is failing. Run your fingernail across the lens, if it catches slightly, the surface is degraded.
- Cloudiness or haze: A milky, frosted appearance means oxidation has reached the polycarbonate itself. The haze is on the outside, not inside.
- Surface roughness: If the lens feels gritty or sandpaper-like to the touch, road grit has embedded itself in the softened plastic.
- Reduced night visibility with glare: If oncoming headlights appear as a blinding glare while the road looks dim, your lenses are scattering light instead of projecting it. This is classic external oxidation.
The fingernail test: Lightly scratch the lens surface with your fingernail. If a faint mark appears, the oxidation is external and restoration will remove it. If the surface feels perfectly smooth but still looks cloudy, the problem may be internal.
Internal damage, restoration will NOT fix this
Internal issues mean the assembly must be replaced. No amount of sanding or polishing can reach inside a sealed housing.
- Condensation or water droplets inside the lens: This indicates a failed seal or a crack in the housing. Moisture inside the assembly can damage the reflector and bulb socket.
- A dark or burned spot visible behind the lens: This is a failed reflector or a burnt bulb. Polishing the outside will not restore the reflective surface inside.
- Cracks or chips that extend through the full thickness of the lens: These compromise the housing seal and allow moisture in.
- A yellow or brown tint that appears only around the edges, with a clear center: This pattern often indicates the reflector bowl inside has degraded, not the outer lens.
How to check in 60 seconds
- Park in daylight and stand directly in front of the headlight.
- Look at the lens surface at an angle, external oxidation appears as a dull, frosted layer on top of the plastic.
- Shine a flashlight through the lens from the outside. If the beam looks clear but the lens looks hazy, the issue is external. If the beam itself looks dim or yellow, the reflector or bulb may be failing.
- Check for moisture: look for droplets, fogging, or a water line inside the assembly.
If your headlights show external signs only, yellowing, haze, or surface roughness, restoration is the right call. The process removes the damaged outer layer and restores light transmission, which directly improves safety for night driving. According to the National Highway Traffic Safety Administration on vehicle lighting, properly functioning headlights are critical for safe nighttime driving, and degraded lenses significantly reduce their effectiveness.
If you are still unsure, a quick visual inspection can help determine whether restoration will help or whether you need a replacement.
What the Mobile Restoration Process Includes
A professional mobile headlight restoration service follows a systematic process that takes 30 to 60 minutes per vehicle. Here is what happens when a technician arrives:
- Inspection and prep: The technician examines both lenses for the depth of oxidation, pitting, and any cracks. The surrounding paint is masked to protect it from abrasives.
- Wet sanding: Starting with a coarse grit and moving to finer grits, the technician removes the degraded outer layer of the polycarbonate lens. This step eliminates yellowing and deep haze.
- Machine polishing: A polishing compound and a variable-speed buffer restore optical clarity, removing the fine scratches left by sanding.
- Cleaning and sealing: The lens is cleaned thoroughly to remove all residue. A protective coating is then applied to seal the restored surface.
The critical difference between a lasting result and a temporary fix is step four. The ceramic UV sealant is designed to block the ultraviolet radiation that causes re-oxidation. This is the step DIY kits skip or do poorly, which is why their results fade so fast.
How Long Does Headlight Restoration Last?
The durability of headlight restoration depends almost entirely on the quality of the protective coating applied at the end of the process. A basic wax or polish offers minimal UV protection and may only last a few months. A professional-grade ceramic UV sealant provides a much longer window.
For vehicles in high-altitude, high-sun climates, the thin air means more solar radiation reaches the surface, accelerating the degradation of unprotected plastics. This is why a durable sealant matters more for drivers in these conditions than for those in overcast coastal areas.
With a ceramic UV sealant, restored headlights typically maintain their clarity for up to three years. This longevity is the primary reason professional restoration offers better value than DIY kits, which often need reapplication every few weeks.
Benefits of Ceramic UV Sealant for Headlights
Ceramic UV sealant is a liquid polymer that bonds to the restored polycarbonate surface, creating a hard, transparent layer. Its primary job is to block ultraviolet radiation, the same radiation that caused the original oxidation, stopping the degradation cycle from restarting.
The ceramic layer is also hydrophobic, so water beads up and rolls off rather than sitting on the surface. This reduces water spotting, makes future cleaning easier, and resists road grime and minor abrasion.
Professional-grade ceramic coatings are engineered for automotive exterior use and are rated for years of exposure, not months. When applied correctly to a properly prepared surface, the bond withstands washing, weather, and normal driving conditions.
Headlight Restoration Cost vs. Replacement
The cost gap between headlight restoration and full replacement is substantial, but the exact numbers depend on your vehicle. Here is a realistic breakdown of what drivers typically pay.
Replacement costs. A single aftermarket headlight assembly for a mainstream sedan or crossover typically runs between $150 and $400 for the part alone. OEM (original equipment manufacturer) assemblies from the dealership often cost $500 to $1,200 per side. Labor adds another $100 to $300 because the technician must remove the front bumper cover, disconnect the wiring harness, and in many late-model vehicles, recalibrate the adaptive headlight system with a scan tool. For vehicles with HID or LED projectors, the ballast or driver module is often sold separately, adding $100 to $400 more. Total replacement cost for one side commonly lands between $400 and $1,800.
Restoration costs. Professional mobile headlight restoration in the United States typically runs between $80 and $150 per vehicle (both headlights), including the full wet-sanding and machine-polishing process plus a UV sealant (bbb.org). Because the service is mobile, there is no shop overhead, and the 30 to 60 minute service time keeps labor charges minimal. The result is a savings of $300 to $1,600 compared to replacement.
When replacement is unavoidable. Restoration is the right choice when the lens is degraded but the housing is intact. You must replace the assembly if any of the following are true:
- The housing has a visible crack or is leaking moisture.
- The mounting tabs are broken, so the assembly cannot be secured properly.
- The lens is severely pitted from road debris, with damage that extends into the reflector behind it.
- The internal projector or reflector is burned, corroded, or misaligned.
- The assembly has internal condensation that cannot be dried out, which indicates a failed seal.
If you are unsure which category your vehicle falls into, an inspection can help determine the best course of action.
| Option | Time Required | Typical Cost (USD) | Result |
|---|---|---|---|
| DIY kit | 1-2 hours, your labor | $15-$40 upfront | Fades in weeks; may scratch lens |
| Professional restoration | 30-60 minutes, on-site | $80-$150 per vehicle | Lasts up to 3 years with ceramic sealant |
| Aftermarket replacement | Half to full day at shop | $400-$1,200 per side | New parts, but expensive |
| OEM dealership replacement | Full day at shop | $800-$1,800 per side | Factory parts, highest cost |
One additional consideration: your auto insurance policy may cover headlight replacement if the damage resulted from a collision or a covered comprehensive claim. Compare your deductible against the replacement estimate before filing.
Book Your On-Site Appointment
Driving with cloudy headlights is a safety risk you do not need to accept. Reduced light output makes night driving harder and increases the chance of missing hazards on dark roads. The fix is fast, affordable, and comes to you.
Colorado Headlight Restoration brings the entire process to your home or office. Our service restores OEM clarity to yellowed or oxidized lenses, improves nighttime visibility, and includes a ceramic UV sealant built to handle high-altitude sun for up to three years. We back every job with a one-year free re-restoration guarantee, so you can be confident in the result. To see current pricing and check our service area, visit the Colorado Headlight Restoration pricing page and book an appointment at a time that works for you.
Frequently Asked Questions
Is professional headlight restoration worth it compared to replacement?
Yes, when the lenses are intact and the issue is surface oxidation or yellowing. Professional restoration costs a fraction of new headlight assemblies, which can run hundreds or thousands of dollars for modern vehicles with integrated sensors or LED units. The process removes surface degradation and applies a protective coating, restoring OEM clarity and light transmission. If your lenses have deep cracks or internal moisture, replacement may be the only option, but an assessment can help determine that on-site.
How long does a mobile headlight restoration appointment take?
A standard mobile headlight restoration appointment takes 30 to 60 minutes. The exact time depends on the severity of the oxidation and the condition of the lenses. The service is performed at your home or office, so you do not need to wait in a shop. After the restoration, the ceramic UV sealant needs a short curing period before you drive. The technician will confirm when the car is ready to move.
What is the difference between DIY kits and professional restoration?
DIY kits typically use a thin sealant that breaks down within weeks or months under UV exposure. Professional restoration uses machine buffing and wet sanding to remove deeper oxidation, followed by a ceramic UV sealant designed to last up to three years. The process also includes a one-year free re-restoration guarantee, so if the results do not hold, you are covered for a free re-restoration.
Does professional headlight restoration include a UV sealant?
Yes. A professional-grade ceramic UV sealant is a standard part of our restoration process. This is the key difference between a temporary polish and a lasting restoration. The sealant blocks UV damage that causes polycarbonate lenses to yellow and oxidize again. Without this protective coating, restored headlights can degrade again within months. With it, you can expect clarity to hold for up to three years under normal driving conditions.
Restoring your headlights is one of the highest-impact, lowest-effort maintenance tasks you can do for your vehicle. It improves safety, refreshes the car's appearance, and protects your resale value. Instead of living with poor nighttime visibility or paying thousands for new assemblies, book a mobile appointment and let a professional bring the lenses back to factory clarity. Get started with Colorado Headlight Restoration and see the difference on your next night drive.
Cloudy headlights? Get your price in 30 seconds.
Mobile service across the Denver metro. Most vehicles finished in 30–60 minutes, right in your driveway.