
Table of Contents
- Does Ceramic Sealant Actually Protect Headlights?
- How Ceramic Sealant Works on Polycarbonate Lenses
- How Long Does Ceramic Headlight Coating Last?
- Step-by-Step Application Process for Ceramic Headlight Protection
- Best Practices for Headlight UV Protection and Maintenance
- Ceramic Coating vs. Paint Protection Film and Other Alternatives
- Why Professional Application Outperforms DIY Headlight Restoration Kits
- Conclusion
- Frequently Asked Questions
Last Updated: September 19, 2026
Does Ceramic Sealant Actually Protect Headlights?
Yes, ceramic sealant protect headlights, but with important caveats about duration and application quality. A ceramic UV sealant creates a hydrophobic, protective layer on polycarbonate lenses that shields against oxidation, UV degradation, and environmental contaminants. However, the level of protection depends heavily on the application method, the specific formulation, and your local climate conditions.
The reality is more nuanced than marketing claims suggest. Ceramic sealant protects headlights by bonding to the clear coat and forming a nano-ceramic barrier that resists yellowing and haze. This layer does reduce UV exposure damage and improves optical clarity. But it's not permanent. Environmental stress, high-altitude sun exposure, temperature fluctuations, and road debris gradually break down the coating over time.
The sealant itself is only part of the equation. Surface preparation, application technique, curing conditions, and post-application maintenance all determine whether your headlights stay clear or start clouding again within weeks.
How Ceramic Sealant Works on Polycarbonate Lenses
Ceramic sealant protects headlights through a multi-layer bonding process that creates a protective barrier on the polycarbonate surface. The nano-ceramic formula contains silica-based compounds that chemically bond to the existing clear coat, creating a hydrophobic top layer that repels water, dirt, and UV rays.
Here's the mechanism: polycarbonate lenses naturally degrade when exposed to UV light and oxidation. The clear coat yellows and becomes hazy. A ceramic sealant sits on top of this clear coat and absorbs UV damage instead of allowing it to penetrate deeper into the lens material. The hydrophobic properties mean water beads and rolls off rather than pooling on the surface, which reduces mineral deposits and contamination buildup.
The bonding agent in quality ceramic formulations creates a molecular connection with the clear coat. This is why surface preparation matters so much. If the lens surface has oxidation, dirt, or residue, the sealant can't bond properly. It sits on top loosely and fails within days. Professional-grade ceramic applications include thorough wet sanding and buffing to create a clean, receptive surface before the sealant is applied.
The chemical resistance of ceramic sealants also protects against road salt, brake dust, and acidic contaminants. These environmental stressors would normally accelerate yellowing and haze on an unprotected polycarbonate lens. The ceramic layer acts as a sacrificial barrier, taking the damage so the lens underneath stays clearer longer.
How Long Does Ceramic Headlight Coating Last?
Most quality ceramic headlight coatings last between 1-3 years under normal driving conditions. Our ceramic UV sealant is formulated to withstand high-altitude sun exposure for up to three years, though actual longevity depends on several factors.
Climate plays a major role. Intense UV exposure, temperature swings, hail, and road salt all degrade ceramic coatings faster. Vehicles parked outdoors in direct sunlight experience faster breakdown than those garaged. Driving frequency matters too. Frequent highway driving exposes headlights to more road debris and wind stress, which can chip or wear the coating.
Maintenance directly impacts durability. Headlights that are regularly washed with gentle soap and protected from harsh chemicals last longer. Abrasive cleaning or using solvent-based products can damage the ceramic layer. Conversely, headlights that are neglected and exposed to brake dust, bug splatter, and tar deteriorate faster because contaminants break down the sealant's hydrophobic properties.
The application quality determines baseline durability more than anything else. A professional ceramic application with proper surface preparation and curing typically lasts the full duration specified. DIY applications often fail within weeks because the sealant wasn't properly bonded to the surface. Even high-quality ceramic products applied incorrectly won't deliver the protection they're designed for.
| Factor | Impact on Durability |
|---|---|
| Professional application | Lasts full duration (1-3 years) |
| DIY application | Often fails within weeks |
| High-altitude sun exposure | Reduces lifespan by 20-40% |
| Regular maintenance | Extends lifespan by 6-12 months |
| Outdoor parking | Faster degradation than garaged vehicles |
| Frequent highway driving | Increases wear from road debris |
Step-by-Step Application Process for Ceramic Headlight Protection
Professional ceramic headlight protection involves careful preparation and precise application to ensure the sealant bonds properly and delivers lasting protection.
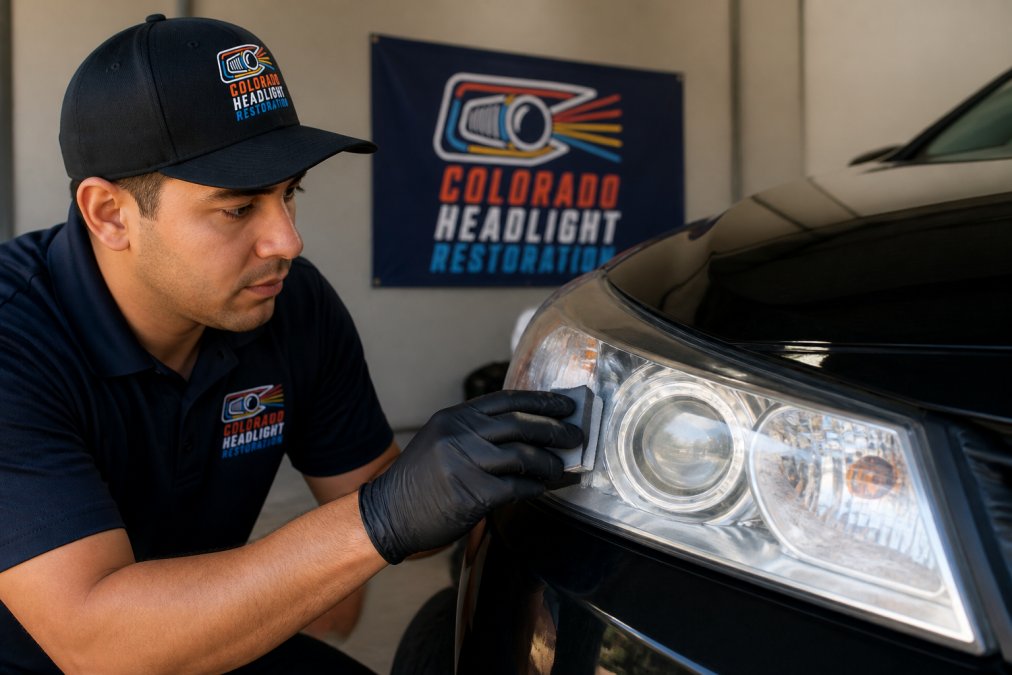
Step 1: Headlight Assessment and Cleaning The process starts with evaluating the current condition of the lens. A technician inspects for oxidation, yellowing, haze, and any cracks or damage. The headlight is thoroughly cleaned with soap and water to remove surface dirt and debris. This initial cleaning removes loose contaminants but doesn't address oxidation yet.
Step 2: Wet Sanding and Surface Preparation This is where most DIY applications fail. The technician uses fine-grit wet sanding to remove the oxidized layer and yellowing from the clear coat. Wet sanding keeps dust down and prevents heat buildup that could damage the polycarbonate. Multiple grits are used, starting coarse and finishing with fine grit to create a smooth, receptive surface. The goal is optical clarity and a surface ready for bonding.
Step 3: Buffing and Refinishing After sanding, the lens is buffed with a microfiber towel and compound to restore clarity and remove any sanding residue. This step is critical because any remaining dust or debris will be trapped under the ceramic sealant. The lens should be crystal clear before the sealant is applied.
Step 4: Isopropyl Alcohol Wipe The lens is wiped with isopropyl alcohol to remove any oils, fingerprints, or residual compound. This ensures the ceramic sealant makes direct contact with the clean clear coat surface. Even small amounts of contamination can prevent proper bonding.
Step 5: Ceramic Sealant Application The ceramic sealant is applied using a microfiber applicator pad in thin, even layers. The application is controlled and methodical, working in small sections to ensure complete coverage. Thin layers bond better than thick ones. Multiple thin coats are often used rather than one heavy coat.
Step 6: Curing The sealant needs time to cure and fully bond to the clear coat. Curing times vary by product but typically range from several hours to 24 hours. During curing, the vehicle should not be driven, and the headlights should not be exposed to water or direct sunlight if possible. Proper curing is essential for the sealant to reach full hardness and protective capability.
Step 7: Final Inspection and Protection Once cured, the headlights are inspected for complete coverage, optical clarity, and hydrophobic properties. A water test confirms that the sealant is creating the intended beading effect. The vehicle is ready for normal driving.
The entire professional process typically takes 30-60 minutes per vehicle.
Best Practices for Headlight UV Protection and Maintenance
Maintaining ceramic-coated headlights requires ongoing care to extend the life of the sealant and keep your lenses clear. Even the best ceramic protection breaks down without proper maintenance.
Wash your headlights regularly with mild soap and water using a soft cloth or sponge. Avoid abrasive scrubbing or harsh chemicals that can damage the ceramic layer. Dry the headlights thoroughly after washing to prevent mineral deposits from hard water. This simple routine removes contaminants before they can bond to the sealant and cause degradation.
Avoid automatic car washes with aggressive brushes near the headlight area. The high-pressure spray and brushes can chip or wear the ceramic coating. Hand washing or touchless washes are safer options. If you use a pressure washer, keep the nozzle at least 12 inches away from the lens and use low pressure.
Protect your vehicle from extended outdoor parking when possible. Garaged vehicles experience slower ceramic degradation because they're shielded from constant UV exposure and environmental stress. If outdoor parking is unavoidable, consider using a car cover for extended periods of non-use.
Inspect your headlights every few months for signs of coating breakdown. Early signs include water no longer beading on the surface, slight yellowing at the edges, or haze returning. If you notice these signs before the expected coating lifespan ends, contact your restoration provider about maintenance options.
Avoid applying other products to your headlights after ceramic coating. Additional waxes, sealants, or polishes can interfere with the ceramic layer or create a barrier that prevents proper bonding of future applications. Stick with simple soap and water for maintenance.
Ceramic Coating vs. Paint Protection Film and Other Alternatives
Ceramic sealant is one of several approaches to headlight protection, each with distinct advantages and limitations. Understanding the trade-offs helps you choose the right solution for your situation.
Ceramic coating creates a hydrophobic, UV-resistant layer on top of the existing clear coat. It's fast to apply, costs significantly less than other methods, and delivers good short-term protection. The main limitation is durability. Ceramic sealant typically lasts 1-3 years before needing reapplication.
Why Professional Application Outperforms DIY Headlight Restoration Kits
DIY ceramic headlight kits are widely available and inexpensive, but they consistently underperform compared to professional application. The gap between DIY results and professional results comes down to surface preparation, product quality, and technique.
Conclusion
Ceramic sealant does protect headlights, but only when applied correctly with proper surface preparation and realistic expectations about durability. The sealant creates a hydrophobic, UV-resistant barrier that slows oxidation and yellowing, improving optical clarity and nighttime visibility. However, it's not a permanent solution. Ceramic coatings typically last 1-3 years before requiring reapplication.
Frequently Asked Questions
How long does ceramic coating protect headlights?
Professional ceramic headlight coatings typically provide protection for 2-3 years under normal driving conditions, with durability depending on climate, UV exposure, and maintenance frequency. High-altitude regions with intense sun exposure may see slightly reduced longevity. Regular washing and avoiding harsh chemicals extend the protective layer's life.
Does ceramic sealant prevent headlight yellowing and oxidation?
Yes, ceramic sealant creates a protective barrier that resists UV degradation and environmental contaminants, which are primary causes of yellowing and haze on polycarbonate lenses. The hydrophobic properties also repel moisture and road salt, reducing oxidation. However, it slows deterioration rather than eliminating it entirely, maintenance and reapplication are necessary for long-term clarity.
What's the difference between professional ceramic coating and DIY restoration kits?
Professional ceramic coatings involve proper surface preparation (wet sanding, isopropyl alcohol cleaning), precise application of nano-ceramic or silica-based formulas, and controlled curing conditions. DIY kits often skip critical preparation steps and use lower-grade bonding agents, resulting in poor adhesion and durability lasting weeks rather than years. Professional application ensures the sealant bonds correctly to the polycarbonate substrate.
Can ceramic sealant be removed if needed?
Yes, ceramic coatings can be removed through mechanical polishing, wet sanding, or solvent-based removal processes. However, removal requires care to avoid damaging the underlying polycarbonate lens. Professional removal is recommended to prevent further lens degradation. The removal process is one reason why professional application and quality formulations matter, they're designed for durability, not easy reversal.
Cloudy headlights? Get your price in 30 seconds.
Mobile service across the Denver metro. Most vehicles finished in 30–60 minutes, right in your driveway.