Table of Contents
- Headlight Restoration: Professional vs DIY at a Glance
- What Is Headlight Restoration?
- DIY Headlight Restoration Kit Effectiveness
- Professional Headlight Restoration: Process and Benefits
- How Long Does Headlight Restoration Last?
- Cost of Replacing Headlight Assemblies vs. Restoration
- Safety, Visibility, and Legal Compliance
- When to Restore vs. When to Replace
- Frequently Asked Questions
Last Updated: September 18, 2026
Headlight Restoration: Professional vs DIY at a Glance
Cloudy, yellowed headlights reduce your nighttime visibility and can make your vehicle look aged. The question isn't whether you need headlight restoration, it's whether to tackle it yourself or hire a professional. This comparison breaks down the real differences between DIY kits and professional headlight restoration services, so you can make the right choice for your situation.
Both approaches can restore clarity to oxidized lenses. But the durability, time investment, and results vary significantly. Understanding these differences helps you avoid costly mistakes and choose the method that actually works for your needs.
What Is Headlight Restoration?
Headlight restoration is the process of removing oxidation, yellowing, and cloudiness from polycarbonate or glass headlight lenses to restore optical clarity and brightness. Over time, UV exposure and weathering degrade the protective clear coat on headlights, causing them to haze and reduce light output.
Restoration works by removing the damaged outer layers through sanding, polishing, or chemical treatment, then applying a protective sealant to prevent future oxidation. The goal is to return the lens to near-original clarity without replacing the entire headlight assembly.
This matters for safety. Cloudy headlights reduce visibility during night driving, and in many jurisdictions, they can fail vehicle inspections. Restoration is typically far cheaper than replacing the entire assembly, which can run into the hundreds of dollars.
DIY Headlight Restoration Kit Effectiveness
DIY kits offer affordability and convenience. You control the timing and can work at your own pace. However, effectiveness depends heavily on the kit type, the severity of oxidation, and your application technique.
Most DIY kits work through one of two mechanisms: abrasive sanding or chemical cleaning. Abrasive kits remove the damaged clear coat layer by layer. Chemical kits dissolve oxidation without sanding. Both can produce visible improvements, but results vary in durability and depth of restoration.
The real challenge with DIY kits is consistency. A professional applies the same technique every time. You're learning as you go, which increases the risk of uneven results, sanding through the lens, or applying sealant incorrectly. Even high-quality kits depend on user execution.
Types of DIY Kits and Their Results
Cerakote Ceramic Headlight Restoration Kit combines oxidation removal wipes with a ceramic clear coat. No power tools required. The ceramic technology offers some UV protection, and users report ease of application. This kit works well for mild to moderate cloudiness. Best for: DIY enthusiasts who want simplicity and don't have power tools.
3M Headlight Restoration Kit uses a drill-mounted sanding system with multiple abrasive disc grades. This is heavy-duty restoration designed for severe oxidation. The multi-stage sanding approach mimics professional-grade techniques. Results are comparable to professional sanding methods when applied correctly. The trade-off: you need a power drill, and careless handling can damage surrounding paint. Best for: users with severely yellowed lenses who own a power drill and are comfortable with power tools.
Meguiar's Two-Step Headlight Restoration Kit skips sanding entirely. It focuses on cleaning and coating to prevent future yellowing. This approach is fast and carries no risk of sanding damage. However, it's less effective on deep oxidation. Best for: beginners or those with mild cloudiness who want a quick, simple process.
Common Mistakes That Reduce Kit Performance
Insufficient sanding is the most common error. Rushing through the grit progression leaves haze underneath. Professional restoration uses multiple sanding stages; skipping steps produces mediocre results.
Uneven application causes streaking or patchy clarity. Sanding or polishing in one direction, or applying sealant too thick in spots, creates visible inconsistencies. Professionals use controlled techniques to avoid this.
Over-sanding damages the lens itself. Pushing too hard or spending too long on one area can sand through the protective layer and into the substrate, creating permanent damage that no restoration can fix.
Skipping the sealant step leaves your work vulnerable. Even after excellent sanding and polishing, the lens will re-oxidize within weeks without a protective clear coat or sealant. This is why professional services include sealant as standard.
Environmental conditions matter. Applying kits in direct sunlight, humidity, or cold temperatures affects cure time and coating adhesion. Most kits require specific temperature ranges and dry conditions.
Professional Headlight Restoration: Process and Benefits
Professional headlight restoration combines expertise, equipment, and protective coatings that DIY kits cannot match. The process is systematic and repeatable, which is why results are consistent and durable.
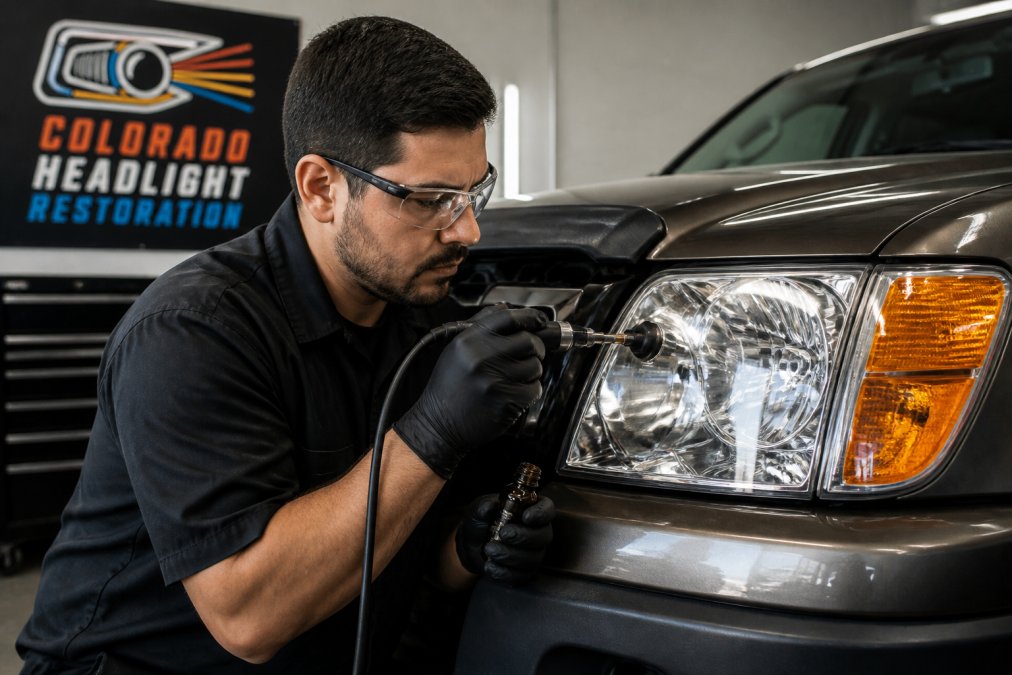
A professional restoration typically follows this sequence: assessment of oxidation severity, multi-stage sanding with progressive grit abrasives, wet sanding to prevent dust and heat damage, polishing to restore clarity, and application of a protective ceramic UV sealant. The entire process takes 30-60 minutes per vehicle.
Colorado Headlight Restoration uses a mobile service model, meaning the technician comes to your home or office. This convenience eliminates the need to drop off your vehicle. The ceramic UV sealant applied during professional restoration is designed to withstand high-altitude sun exposure for up to three years, which is significantly longer than most DIY kits.
The professional advantage lies in three areas: technique, materials, and accountability. Technicians perform this work repeatedly and understand exactly how much pressure, sanding angle, and sealant thickness produce optimal results. Professional-grade materials, particularly ceramic sealants, offer better UV protection and durability than consumer kits. And professional services back their work with guarantees. Colorado Headlight Restoration offers a one-year free re-restoration guarantee, meaning if your headlights degrade within that period, they'll restore them again at no charge.
This guarantee matters. It signals confidence in the process and protects you if something goes wrong. DIY kits come with no such assurance.
How Long Does Headlight Restoration Last?
Durability is where professional and DIY approaches diverge most significantly. The longevity of any restoration depends on the sealant quality, environmental exposure, and initial oxidation severity.
DIY kits typically last 3-6 months for mild cases, up to 12 months in favorable conditions. Some premium kits claim longer protection, but real-world durability often falls short of marketing claims. The protective coatings in consumer kits are thinner and less UV-resistant than professional-grade materials.
Professional restoration with ceramic sealant lasts substantially longer. A ceramic UV sealant is engineered to resist oxidation and weathering.
Internal vs. External Oxidation and Longevity
Understanding oxidation types explains why durability varies.
External oxidation occurs on the lens surface and clear coat. This is what you see, the haze and yellowing. Both DIY kits and professional restoration address this. Sanding removes the damaged clear coat, and sealant prevents new oxidation from forming.
Cost of Replacing Headlight Assemblies vs. Restoration
A full headlight assembly replacement costs hundreds of dollars per headlight. For many vehicles, OEM assemblies can be expensive, plus labor. Aftermarket assemblies are cheaper but often lower quality. Total cost for both headlights can be substantial when labor is included.
| Approach | Upfront Cost | Time Investment | Durability | Risk of Poor Results |
|---|---|---|---|---|
| DIY Kit | $15-35 | 1-2 hours | 3-12 months | High |
| Professional Service | Varies | 30-60 minutes | Up to 3 years | Low |
| Headlight Assembly Replacement | $600-1000+ | 2-4 hours labor | Permanent (OEM) | None |
Safety, Visibility, and Legal Compliance
Headlight clarity directly affects nighttime visibility. Cloudy headlights reduce light output by up to 50%, which impairs your ability to see the road and makes your vehicle less visible to oncoming traffic. This is a genuine safety issue, not cosmetic.
When to Restore vs. When to Replace
Restoration makes sense when oxidation is external and moderate to severe. If your headlights are hazy but the assembly is intact and functioning, restoration returns them to near-original clarity at a fraction of replacement cost.
Frequently Asked Questions
Is professional headlight restoration worth it?
Professional headlight restoration is worth it if you want results that last 2-3 years and don't want to spend time on a DIY project. The ceramic UV sealant applied by professionals offers superior protection against oxidation and UV degradation compared to most DIY kits. For drivers who prioritize convenience and durability, professional restoration saves frustration and delivers OEM clarity that improves nighttime visibility and safety.
How long does professional headlight restoration last compared to DIY?
Professional restoration typically lasts 2-3 years with a quality ceramic sealant, while DIY kit results vary widely. Basic DIY kits may last 3-6 months before yellowing returns, while premium kits with ceramic coatings can last 1-2 years if applied correctly. Professional-grade sealants withstand high-altitude UV exposure and weathering better than consumer-level products, making them the more durable choice for long-term clarity.
What is the cost of replacing headlight assemblies vs. restoration?
Full headlight assembly replacement can be expensive, depending on your vehicle's make and model. Professional restoration costs a fraction of replacement and delivers comparable clarity without the expense of new parts. DIY kits cost less but require your time and effort, and results may not match professional quality or durability.
What is the best method for headlight restoration?
The best method depends on your headlight condition and budget. Professional restoration suits severe oxidation, internal cloudiness, and drivers who want guaranteed results. DIY kits work well for mild to moderate external yellowing if you follow instructions carefully and have patience. For the longest-lasting results and OEM clarity, professional-grade restoration with ceramic sealant outperforms DIY alternatives.
How does internal oxidation affect restoration results?
Internal oxidation occurs inside the sealed headlight assembly and cannot be fixed by sanding or polishing the exterior. If moisture has penetrated the lens, professional restoration can only improve external clarity. In severe cases of internal degradation, assembly replacement may be necessary. Professional technicians can assess whether internal oxidation is present and recommend the best solution for your vehicle.
Cloudy headlights? Get your price in 30 seconds.
Mobile service across the Denver metro. Most vehicles finished in 30–60 minutes, right in your driveway.