
Table of Contents
- Why Headlights Turn Yellow and Cloudy
- What You'll Need for a Permanent Headlight Fix
- Step-by-Step: How to Fix Cloudy Headlights Permanently
- Headlight Restoration Kit vs Professional Service
- How Long Does Headlight Restoration Last?
- Best Way to Clean Yellow Headlights: DIY vs Pro
- Common Mistakes That Ruin Your Restoration
- Final Verdict: Get Crystal-Clear Headlights That Last
- Frequently Asked Questions
Last Updated: September 7, 2026
Why Headlights Turn Yellow and Cloudy
Headlight clouding is the result of UV degradation, not simple dirt. Nearly all modern headlight lenses are molded from polycarbonate, a plastic chosen for its impact resistance. Manufacturers apply a thin factory clear coat to shield that plastic from the sun. Over years of exposure, that protective layer breaks down, oxidizes, and turns yellow, leaving the lens hazy and foggy.
The discoloration is a two-stage problem: the factory clear coat degrades and flakes, then the exposed polycarbonate oxidizes and yellows. This is why washing does nothing, the damage is chemical, not surface-level. The haze is microscopic roughness scattering light.
We see this on vehicles of every age, a 2008 Honda Civic with 180,000 miles can show the same oxidation as a five-year-old luxury SUV. Understanding that this is UV damage points to the real solution: remove the degraded plastic and replace the lost protection.
What You'll Need for a Permanent Headlight Fix
Fixing cloudy headlights permanently requires abrasives to remove oxidation and a UV-resistant clear coat to replace factory protection. Polishing alone is temporary because it leaves bare polycarbonate exposed to the same sun that damaged it originally.
Gather these items before you start:
- Painter's masking tape and plastic sheeting to protect the surrounding paint
- Automotive soap and a wax and grease remover for surface preparation
- Grit sandpaper in progressive grades (800, 1500, 2000, and 3000) for wet sanding
- A spray bottle with clean water to keep the surface lubricated
- A polishing compound and foam polishing pad to restore transparency
- A microfiber cloth for final buffing
- A UV-resistant clear coat formulated for plastic lenses
- An adhesion promoter if your chosen clear coat requires it
The distinction between a temporary polish and a permanent fix comes down to that final clear coat. A polish removes the yellowed layer but leaves the lens defenseless; the clear coat prevents the cloudiness from returning.
Step-by-Step: How to Fix Cloudy Headlights Permanently
The complete process takes roughly one to two hours of hands-on work, plus curing time. Work in a shaded area, because heat causes the sandpaper to load up and the clear coat to flash too quickly.
Step 1: Surface Preparation and Masking
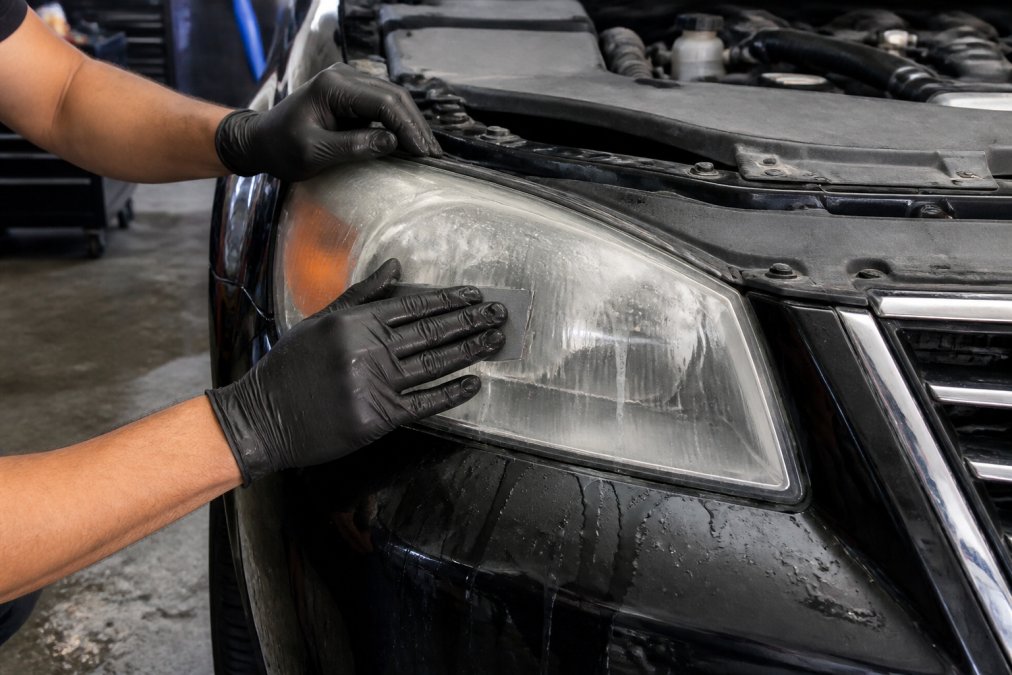
Wash the housing with automotive soap, dry it, then wipe the lens with a wax and grease remover, any residual oil or wax will prevent the clear coat from bonding. Mask off surrounding painted panels with painter's tape and plastic sheeting, leaving only the lens exposed.
Step 2: Wet Sanding to Remove Oxidation
Spray the lens with water, wrap sandpaper around a soft block, and sand in overlapping horizontal passes. Start with 800 grit, then progress to 1500, 2000, and 3000 grit. Keep the surface wet to flush debris and prevent gouging. The yellow layer will disappear and the lens will turn frosty white, that indicates you have reached bare polycarbonate.
Step 3: Polishing and Buffing for Clarity
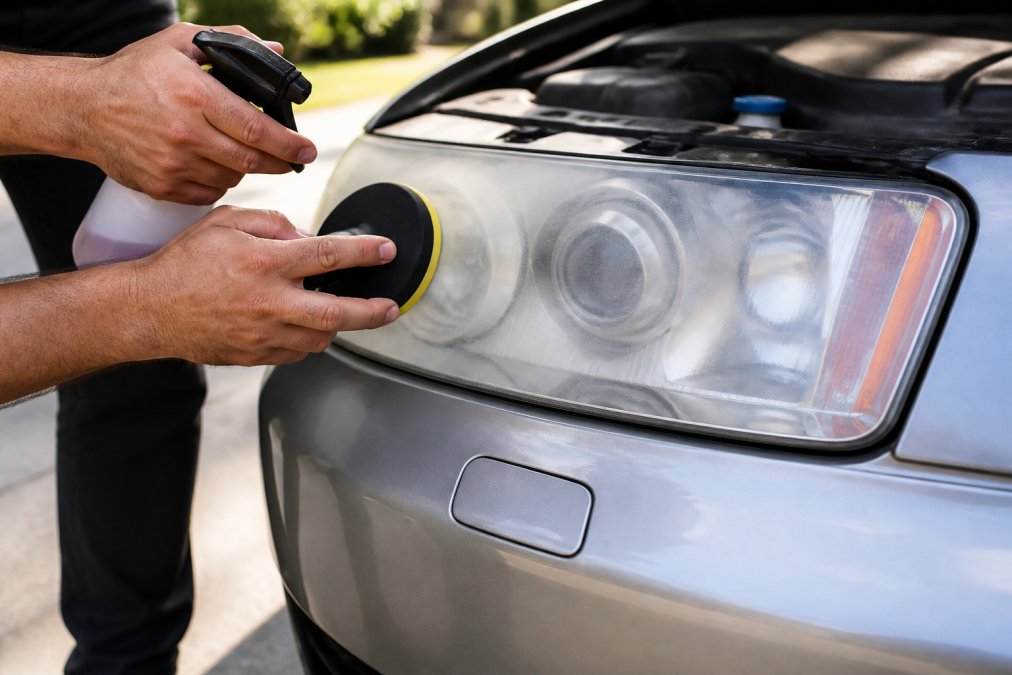
Once the lens is uniformly frosted, switch to a polishing compound and foam pad, working in a circular motion until the frost disappears. Buff residue away with a microfiber cloth. At this stage the lens looks clear but is completely unprotected, do not stop here unless you want the cloudiness to return within a month.
Step 4: Applying UV-Resistant Clear Coat
Wipe the lens with a tack rag, then apply the UV-resistant clear coat in light, even passes. Follow the manufacturer's instructions for flash time between coats, typically two to three thin coats provide the best durability. Allow full curing before exposing the vehicle to rain or washing; curing ranges from a few hours to overnight.
Headlight Restoration Kit vs Professional Service
The decision between a DIY kit and a professional service hinges on the chemistry of the protective layer and the cost of your time.
What DIY Kits Actually Include
Entry-level kits ($15-$30) include polishing compound, a foam pad, and a spray sealant that is essentially diluted acrylic (consumerreports.org). These work on light haze but block less than 50% of UV-A radiation, so results fade in 4-8 weeks. Mid-tier kits ($30-$60) add sandpaper and a thicker sealant, but still rely on a wipe-on product rather than a sprayable clear coat. None include an adhesion promoter, which is critical for bonding to bare polycarbonate.
The Real Cost of DIY
A proper DIY restoration using separate materials costs $60-$90, plus 2-3 hours of active work and overnight curing. At $25 per hour, the true cost is $110-$165. Professional services often include a ceramic or two-part urethane coating that lasts 2-3 years, not months.
The Hidden Variable: Housing Material
Nearly all lenses made since the mid-1990s are polycarbonate, which requires a UV clear coat. Some older vehicles, particularly trucks and budget cars from the 1980s and early 1990s, use glass lenses, which do not oxidize or yellow. For glass, a simple polish with a glass-specific compound and ceramic sealant is sufficient. Check for a "PC" marking molded into the housing edge, or test with a drop of water, polycarbonate beads water, while glass sheets it.
When Professional Service Wins
Professional services often use an orbital sander with a foam interface pad, which removes material evenly across the curved lens. Hand sanding with a block tends to flatten the crown, leaving an uneven surface. Professional-grade coatings, such as two-part urethane or ceramic with a 9H hardness rating, can provide abrasion resistance in addition to UV blocking, but are generally not sold to consumers because they require mixing and spray equipment.
How Long Does Headlight Restoration Last?
A properly executed restoration with a UV-resistant clear coat lasts two to three years under normal driving conditions. Longevity depends primarily on the quality of the protective layer and the climate, vehicles parked outdoors in intense sun degrade faster.
DIY kits that rely on spray sealants typically last only a few months because the protective layer is too thin to block UV radiation effectively. The fix is not to polish more aggressively; it is to use a thicker, more durable protective coating.
Best Way to Clean Yellow Headlights: DIY vs Pro
The best way to clean yellow headlights depends on your tolerance for effort and expectations for longevity. For a vehicle you plan to sell soon, a quick DIY polish may suffice. For a daily driver you intend to keep, professional restoration with a durable sealant is more cost-effective over time.
Home remedies like toothpaste or baking soda are too mild to remove real oxidation and can leave fine scratches. A proper wet sanding and clear coat process is the only DIY method that approaches professional results, but it requires the right materials and an afternoon of work.
Professional restoration removes the guesswork. The process is similar to DIY, but professional services often use specialized equipment and higher-grade materials. For busy owners, the value is in the time saved and the assurance of a lasting result.
Common Mistakes That Ruin Your Restoration
DIY headlight restoration also carries environmental and safety risks that most guides ignore.
The Sanding Slurry Problem
Wet sanding produces a slurry of water and microplastic particles, each lens can shed 2-5 grams of polycarbonate dust. If you work in a driveway, that slurry washes into storm drains and waterways. The EPA regulates industrial discharge under the Clean Water Act, but residential runoff is unregulated, so the responsibility falls on you (the EPA). Work on a tarp or catch basin and dispose of residue rags in the trash, not by hosing the area down.
Chemical Runoff and Paint Damage
Products containing methylene chloride or N-methyl-2-pyrrolidone (NMP) are effective but dangerous, methylene chloride is a probable human carcinogen, and NMP is restricted under the Toxic Substances Control Act (the EPA). These solvents also soften and discolor automotive paint on contact. If you use them, mask off a 6-inch perimeter with automotive-grade tape and plastic sheeting, and never pour leftovers down a drain, take them to a household hazardous waste collection site.
The Adhesion Promoter Oversight
The most common technical mistake is skipping the adhesion promoter. Bare polycarbonate is a low-surface-energy plastic, so most coatings will not bond without a chemical bridge. An adhesion promoter, typically a silane-based primer, creates microscopic bonding sites. Without it, even a high-quality clear coat will delaminate within 6-12 months. Apply it in a thin, even coat and wait the manufacturer-specified flash time (usually 5-10 minutes) before applying the clear coat.
Sanding Through the Lens Edge
The edge of the housing, where the lens meets the bezel, is thinner than the center. Aggressive sanding with 800 grit there can create a weak spot that cracks under thermal stress. Stop sanding 1/4 inch from the edge and hand-sand that border with 1500 grit only.
Curing in Humid Conditions
Clear coats cure through a reaction with moisture in the air. In humidity above 70%, the surface forms a skin before lower layers cure, trapping solvents and creating a soft, tacky finish. Check humidity before spraying, if above 70%, wait for a drier day or work in a climate-controlled garage. Temperatures below 60°F slow the cure and can cause clouding.
Final Verdict: Get Crystal-Clear Headlights That Last
Cloudy headlights are a fixable problem, not a reason to replace expensive assemblies. The permanent solution requires removing the oxidized polycarbonate through wet sanding and replacing the factory protection with a UV-resistant clear coat. Done correctly, the result is factory-level clarity that lasts for years.
The trade-off is between your time and your convenience. A DIY restoration demands an afternoon, the right materials, and careful technique. A professional mobile service like Colorado Headlight Restoration performs the same process in 30 to 60 minutes at your home or office, using a ceramic UV sealant built for high-altitude sun, backed by a one-year free re-restoration guarantee.
For drivers who want crystal-clear headlights without the hassle, the choice is clear. Book an appointment with Colorado Headlight Restoration and let us handle the sanding, polishing, and sealing while you get back to your day.
Frequently Asked Questions
How long does a professional headlight restoration last?
A professional headlight restoration with a quality UV clear coat typically lasts 2 to 3 years. The durability depends on the quality of the sealant and your local climate. In high-sun areas, UV degradation happens faster, so a ceramic UV sealant is the best choice. Colorado Headlight Restoration backs their work with a one-year free re-restoration guarantee, so you're covered if the clarity fades sooner than expected.
Is a headlight restoration kit as good as a professional service?
DIY kits work for light oxidation but rarely deliver permanent results. Most kits include sandpaper and a polish, but they skip the UV-resistant clear coat that prevents future yellowing. Without that protective layer, UV degradation returns within months. Professional services often use automotive-grade clear coat or ceramic sealants and proper surface preparation, which can lead to results lasting years instead of weeks. For severely oxidized lenses, professional sanding equipment can also remove deeper damage more evenly.
Does WD-40 really clean headlights?
WD-40 can temporarily remove light haze and grime from headlights, but it is not a permanent fix. The product dissolves surface dirt and some oxidation, making lenses look clearer for a few days. It does not restore the UV-protective layer that has worn away, so the polycarbonate will re-oxidize quickly. Use WD-40 only as a quick temporary cleaner, then follow up with proper wet sanding, polishing, and a UV-resistant clear coat for lasting clarity.
What is the difference between polishing and clear coating headlights?
Polishing removes the oxidized outer layer of the polycarbonate lens to restore transparency. It brings back the clarity but leaves the plastic bare and vulnerable to future UV damage. A UV-resistant clear coat seals the freshly polished surface, blocking the sun's rays that cause yellowing and haze. Polishing alone gives you a temporary fix that fades in weeks. The clear coat is what makes the restoration permanent, which is why skipping it is the most common DIY mistake.
Cloudy headlights? Get your price in 30 seconds.
Mobile service across the Denver metro. Most vehicles finished in 30–60 minutes, right in your driveway.