
Table of Contents
- Why Night Driving Visibility Gets Worse in Colorado
- Headlight Restoration Benefits for Nighttime Safety
- How to Clean Cloudy Headlights at Home
- Headlight Assembly Replacement Cost vs Restoration
- Windshield and Glass Care for Clearer Night Vision
- Reducing Glare From Oncoming Traffic
- Seasonal Maintenance Checklist for Colorado Drivers
- Frequently Asked Questions
Last Updated: September 13, 2026
Why Night Driving Visibility Gets Worse in Colorado
Driving at night already cuts your margin for error. In Colorado, the conditions that degrade night driving visibility stack up faster than most drivers expect. This guide from Colorado Headlight Restoration breaks down what actually causes the problem and how to fix it without paying for parts you don't need.
Altitude plays a bigger role than most people realize. At higher elevations, the atmosphere filters less of the sun's ultraviolet radiation, so your headlight lenses absorb more UV every single day (the EPA). That energy slowly breaks down the clear coat on polycarbonate lenses, which is why they turn yellow and hazy years before the rest of the car shows its age.
Then there's the grit. Road sand, magnesium chloride dust, and fine gravel pit the lens surface through winter, and each tiny pit scatters light instead of projecting it down the road. Add Colorado's freeze-thaw swings and the plastic expands and contracts repeatedly, opening micro-cracks that cloud the lens from the inside out.
The result: less usable light on the road, more glare back at you, and a shorter distance to react.
How Altitude and Sun Exposure Affect Headlight Clarity
Headlight clarity is the ability of a lens to transmit light without scattering it. High-altitude sun exposure and abrasive road debris are the two fastest ways to lose it.
UV radiation degrades the factory clear coat that protects polycarbonate (PubMed). Once that coating fails, the plastic underneath oxidizes and turns from transparent to cloudy yellow. Colorado's intense sun accelerates this process compared to lower-elevation states, and it happens on a timeline most drivers never track.
The practical takeaway: if your car is more than five or six years old and has spent its life outdoors here, your lenses are almost certainly transmitting less light than they did new. You can check this at home with a simple test.
- Park facing a wall at night, turn on low beams, and photograph the beam pattern
- Compare the lens surface to a clear drinking glass held up to light
- Run a fingernail across the top of the lens; if it catches, the UV coat is gone
- Look for a yellow tint at the edges where sun hits most directly
If two or more of those checks fail, restoration is usually the right move.
Headlight Restoration Benefits for Nighttime Safety
Headlight restoration is the process of removing the oxidized layer from a lens and resealing it, which restores most of the original light output without replacing any parts. The safety payoff is straightforward: more light on the road, less glare bouncing back at you, and a beam pattern that actually points where you need it.
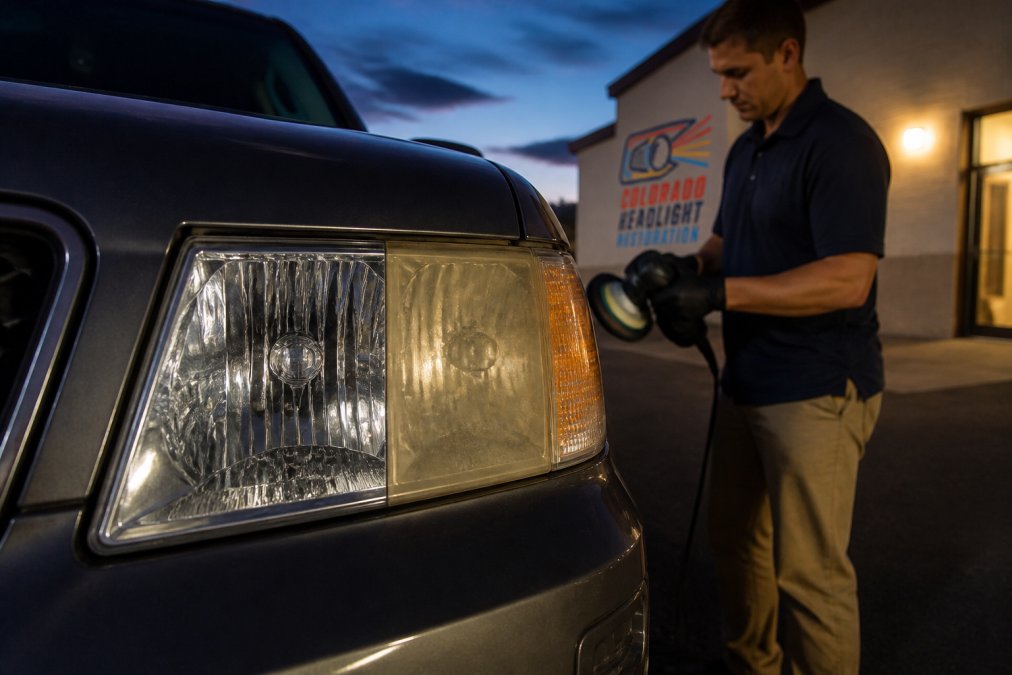
Restored lenses also improve how other drivers see you. A cloudy lens scatters light in every direction, which means oncoming traffic sees a dim, fuzzy glow instead of a defined beam. That cuts your visibility to them as much as it cuts theirs to you.
There's a financial angle too. A full assembly replacement means buying the housing, the bulb, the ballast on some models, and paying for labor to remove the bumper on many vehicles. Restoration skips all of that. You keep the factory housing and get back the clarity you lost.
How to Clean Cloudy Headlights at Home
Cleaning cloudy headlights at home works well when the cloudiness is surface-level oxidation, not deep internal damage. The process is straightforward, but the sealant step is what separates a fix that lasts from one that fades in a month.
Here's the sequence most DIY approaches get wrong, in order:
- Wash and degrease the lens with dish soap and water, then dry completely
- Mask the paint around the headlight with painter's tape
- Wet-sand with progressively finer grits, typically 800, then 1500, then 2000
- Polish the sanded surface with a plastic polish and a foam pad
- Seal with a UV-protective clear coat or ceramic sealant
- Cure according to the product instructions before driving
The sanding removes the dead plastic layer. The polish brings back clarity. The seal replaces the UV protection you just sanded off.
Skip step five and you've done nothing but accelerate the problem. Bare polycarbonate oxidizes faster than coated polycarbonate, so an unsealed DIY job often looks worse within weeks than it did before you started. That's the single most common mistake when people ask why their kit didn't work.
DIY Kits vs Professional Restoration: What Actually Lasts
DIY kits and professional restoration both remove oxidation. The difference is in the sealant and the preparation, and that's where longevity is decided.
Most off-the-shelf kits include a small bottle of UV sealant that breaks down under intense sun within a season or two. A professional process uses a ceramic UV sealant formulated to hold up under high-altitude exposure, and the surface is prepped more thoroughly before sealing.
| Approach | Time Required | Typical Durability | Best For |
|---|---|---|---|
| DIY kit | 1-2 hours | One to two seasons | Minor haze, budget focus |
| Professional restoration | 30-60 minutes | Up to three years with ceramic sealant | Significant oxidation, long-term results |
| Full assembly replacement | Hours plus parts | Factory-new lifespan | Cracked or internally damaged housings |
Professional restoration also handles the cases DIY can't. If the cloudiness is inside the lens, or the housing has stress cracks, sanding the outside won't fix it. A professional can tell you in a few minutes whether restoration will work or whether you genuinely need new parts.
Headlight Assembly Replacement Cost vs Restoration
Headlight assembly replacement cost runs into the hundreds or thousands per side on many modern vehicles, because assemblies now include complex LED or projector components that can't be serviced separately (nhtsa.gov). Restoration typically costs a fraction of that and keeps your original housing.
That gap matters because replacement isn't always necessary. A lens that looks terrible from the outside is often perfectly functional underneath. The oxidation is a surface problem, and surface problems have surface solutions.
Here's how to decide:
- Restore if the housing is intact, the lens is cloudy or yellowed, and the light still works
- Replace if the housing is cracked, water is pooling inside, or the internal reflector has failed
- Replace if the assembly is a sealed unit with a failed LED board that can't be serviced
For most drivers dealing with yellowed lenses on a car that's otherwise fine, restoration is the sensible call. It's faster, it costs less, and it keeps factory parts on the vehicle, which matters at resale.
Windshield and Glass Care for Clearer Night Vision
A clean windshield does more for night driving visibility than most drivers give it credit for. Streaks, film, and pitting scatter oncoming light across your whole field of view, which is what turns a normal headlight into a blinding flare.
Start inside the car. Dashboard off-gassing leaves a thin film on the interior glass that you can't see during the day but glows under oncoming headlights at night. Clean interior glass with a dedicated glass cleaner and a microfiber cloth, using a second dry cloth to buff.
Outside, replace worn wiper blades before winter. A streaking blade leaves a film that does the same thing as a dirty windshield. If your windshield has visible pitting from road sand, no amount of cleaning will fix the scatter, and it may be time to look at replacement.
Don't overlook your mirrors either. A hazy side mirror doubles the glare problem and shrinks your usable field of view.
Reducing Glare From Oncoming Traffic
Glare reduction starts with your own equipment. A properly aimed headlight and a clean windshield cut the amount of stray light bouncing around your field of view, which makes oncoming traffic far less overwhelming.
Check your headlight aim. If your beams point too high, they scatter into the eyes of oncoming drivers, and you get more glare reflected back at you. Most shops will check aim quickly, and some do it as part of a basic inspection.
Other practical steps:
- Dim your instrument panel brightness at night; a bright dash makes your eyes adapt to interior light instead of the road
- Keep your windshield and glasses clean; smudges amplify glare
- Look toward the right edge of your lane when a car approaches, not directly at its lights
- Consider anti-reflective coatings on prescription glasses if you wear them
If glare is a persistent problem even with clean glass and aimed lights, the issue is often lens clarity. A cloudy lens sends light in directions it was never meant to go.
Seasonal Maintenance Checklist for Colorado Drivers
Night driving visibility in Colorado changes with the seasons, so maintenance should too. Use this checklist and revisit it each fall before the dark commute returns.
- Fall: Inspect lenses for yellowing and haze; restore before winter
- Fall: Replace wiper blades and top off washer fluid with a winter-rated formula
- Fall: Check headlight aim and replace any dim or flickering bulbs
- Winter: Rinse road salt and magnesium chloride off lenses weekly
- Winter: Keep the windshield reservoir full; grimy spray kills visibility fast
- Spring: Re-check lenses after grit season; pitting shows up now
- Spring: Clean interior glass to remove winter film
- Summer: Inspect the UV sealant on restored lenses; intense sun is hardest on them
The single highest-value item on that list is the fall lens inspection. Once the days shorten, you're driving in the dark more than any other time of year, and that's when a hazy lens hurts most.
Colorado's altitude, sun, and road grit put your headlights through more than most drivers deal with anywhere else, and the result shows up exactly when you need clear vision the most. If your lenses are cloudy, yellowed, or scattering light, Colorado Headlight Restoration can bring them back to OEM clarity with a mobile service that comes to your home or office, completes the job in 30 to 60 minutes, and finishes with a ceramic UV sealant built to hold up under high-altitude sun for up to three years. Every job is backed by a one-year free re-restoration guarantee, and the process costs a fraction of full assembly replacement. Book an appointment with Colorado Headlight Restoration and get your nighttime visibility back.
Frequently Asked Questions
Why is it harder to see while driving at night?
Your eyes rely on rods and cones to process light, and at night the cones that handle color and detail stop working well. Pupils widen to let in more light, which also increases glare sensitivity. Add cloudy headlights, a dirty windshield, or oncoming high beams, and visibility drops fast. In Colorado, high-altitude sun accelerates headlight lens oxidation, making the problem worse over time. Restoring clarity and keeping glass clean are the two biggest fixes.
How can I tell if my headlights need restoration?
Look at the lens in daylight. If it looks yellow, hazy, or has a chalky film, restoration will help. At night, if your beam pattern looks dim or scattered rather than a focused pool of light, the lens is blocking output. Run your hand across the plastic; oxidation feels rough. Most lenses show noticeable clouding after 5-7 years of Colorado sun exposure. A quick restoration can bring back most of the original clarity.
Do night driving glasses actually work?
Yellow-tinted night driving glasses can reduce glare from oncoming headlights for some drivers, but they also dim overall light, which can make unlit roads harder to see. The evidence for consistent benefit is mixed. A better first step is fixing the source: restore cloudy headlights, replace dim bulbs, and clean the inside of your windshield. Those changes improve visibility without reducing the light reaching your eyes.
What are the best ways to reduce glare from oncoming traffic?
Keep your windshield clean inside and out; streaks and film magnify glare. Aim your mirrors to the night position if you have a manual tilt mirror. Avoid staring directly at oncoming headlights; look toward the right edge of your lane. If your own headlights are cloudy, they scatter light upward, which adds to the glare others see and reduces your own downroad view. Restoration helps both problems.
Cloudy headlights? Get your price in 30 seconds.
Mobile service across the Denver metro. Most vehicles finished in 30–60 minutes, right in your driveway.