
Table of Contents
- Why Headlights Turn Foggy and Yellow
- What You'll Need to Clear Foggy Headlights
- Step-by-Step: How to Clear Foggy Headlights Permanently
- Headlight Restoration Kit vs Professional Service
- Ceramic Coating for Headlights: Why It Makes Results Last
- How to Prevent Headlight Oxidation After Restoration
- Common Mistakes to Avoid When Clearing Foggy Headlights
- Conclusion
- Frequently Asked Questions
Last Updated: September 14, 2026
Why Headlights Turn Foggy and Yellow
Foggy, yellowed headlights are caused by oxidation of the polycarbonate lens and the UV clear coat that protects it. Sunlight breaks down that coating over time, and once it fails, the plastic underneath starts to chalk, haze, and discolor (pubmed.ncbi.nlm.nih.gov).
Headlight manufacturers apply a thin UV-hardened clear coat to every new lens. Under constant sun exposure, that layer degrades, and the unprotected polycarbonate begins to oxidize from the outside in. The result is the milky, amber tint you see on older vehicles.
At Colorado Headlight Restoration, we see this pattern constantly on vehicles across the Front Range, where intense high-altitude sun accelerates the breakdown. The NHTSA guidance on vehicle lighting and safety notes that degraded headlights reduce the amount of usable light reaching the road, which directly affects how far ahead you can see at night.
That matters more than most drivers realize. A hazy lens can cut your effective beam distance significantly, and the problem gets worse in rain, snow, or fog when you need visibility most (nhtsa.gov).
What You'll Need to Clear Foggy Headlights
The supplies for a proper restoration are simple but specific. You need a few grits of wet-sanding paper, a polishing compound, a UV sealant, and a handful of tools to keep the work clean.
Here's the short list:
- Wet-sanding paper: 800, 1500, and 3000 grit, plus 600 if the lens is heavily oxidized
- Spray bottle filled with water and a drop of dish soap for lubrication
- Sanding block or backing pad for even pressure
- Plastic-safe degreaser or isopropyl alcohol
- Polishing compound and a foam or microfiber pad
- UV sealant or ceramic coating designed for headlights
- Painter's tape to protect surrounding paint and trim
- Microfiber towels for wiping between steps
The sealant is the step most people skip, and it's the single reason DIY jobs fade in a few weeks. Sanding and polishing restore clarity, but only a UV-blocking topcoat keeps the plastic from oxidizing again.
Step-by-Step: How to Clear Foggy Headlights Permanently
The permanent method is a three-stage process: clean, sand through progressively finer grits, then polish and seal. Skipping any stage, especially the sealant, is why most DIY restorations look great for a month and then haze right back over.
Set aside about an hour of working time per pair of headlights. Work in shade, never direct sun, because heat makes the plastic and compound behave unpredictably.
Step 1: Wash and Degrease the Lens
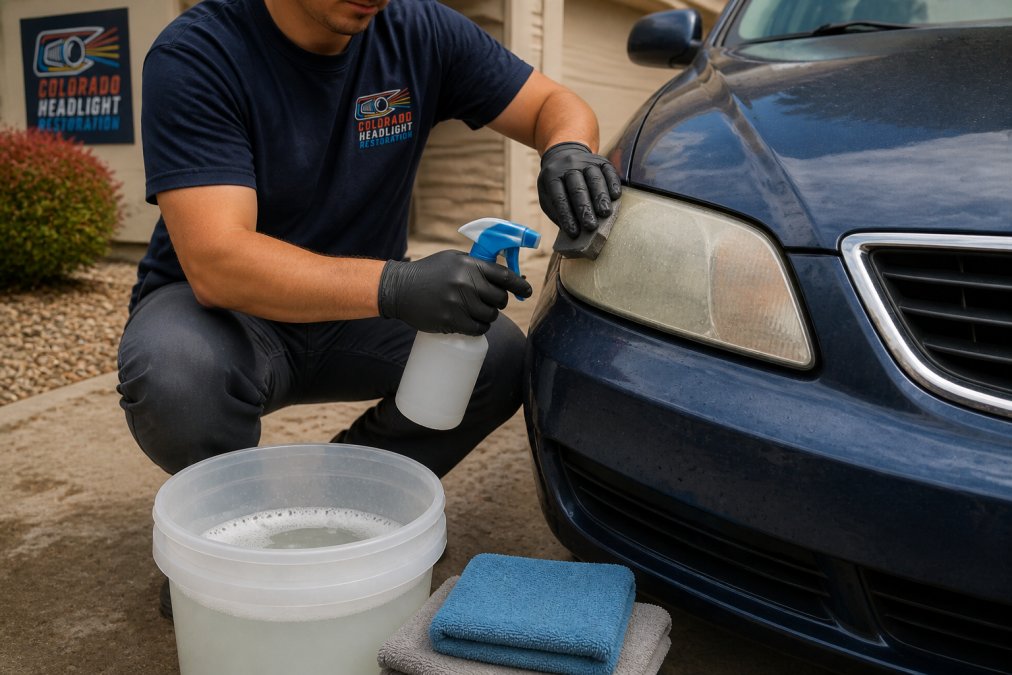
Clean the lens completely before you touch it with abrasive paper. Dirt and road film will get dragged across the surface and scratch it during sanding.
Wash the headlight with soap and water, then wipe it down with a plastic-safe degreaser or isopropyl alcohol. Tape off the surrounding paint and trim with painter's tape so you don't scuff the finish while you work. Let the lens dry fully before moving on.
Step 2: Wet-Sand Through Grits
Wet-sanding removes the oxidized layer of plastic and levels the surface. Start with the coarsest grit you need (600 or 800 for heavy yellowing), then step up to 1500, then 3000.
Keep the surface wet the entire time. Sand in one direction with the coarse grit, then switch to a perpendicular direction with the next grit so you can see when the previous scratches are gone. Rinse the lens and your paper often. When you finish the 3000 grit, the lens should look uniformly cloudy but smooth, not patchy.
Step 3: Polish and Apply UV Sealant
Polishing turns that uniform haze into optical clarity. Apply a small amount of polishing compound with a foam pad and work it in until the plastic clears, wiping residue away as you go.
Now the critical step: apply a UV sealant or ceramic coating made for headlights. This is what makes the result last. Without it, the freshly exposed plastic starts oxidizing again almost immediately.
Headlight Restoration Kit vs Professional Service
A restoration kit costs less upfront but depends entirely on your time, technique, and how well you apply the final sealant. A professional service handles the sanding, polishing, and UV protection with commercial-grade products.
The honest trade-off comes down to three things: how bad the lenses are, how much your time is worth, and how long you want the result to last.
| Factor | DIY Restoration Kit | Professional Service |
|---|---|---|
| Upfront cost | Lower | Higher |
| Time required | 1-2 hours per pair | 30-60 minutes |
| Tools and skill | Your own | Included |
| Sealant quality | Varies by kit | Commercial-grade |
| Typical lifespan | Weeks to months | Up to 3 years |
| Warranty | None | Often included |
Kits work fine on lightly hazed lenses and for owners who enjoy the process. For heavily oxidized lenses, or for anyone who has already tried a kit and watched it fade, a professional restoration is the more durable route.
Ceramic Coating for Headlights: Why It Makes Results Last
Ceramic coating for headlights is a durable, UV-blocking layer applied after polishing that protects the restored plastic from sun damage. It bonds to the lens surface and resists the oxidation that causes yellowing in the first place.
Standard wax or basic sealant offers some protection but breaks down quickly under UV. A ceramic coating is engineered to hold up under sustained sun exposure, which is exactly the condition that destroys headlights in the first place. That durability is what separates a lasting result from a temporary one.
For drivers in high-altitude, high-UV areas, the coating does the heavy lifting. At Colorado Headlight Restoration, our process finishes with a ceramic UV sealant designed to withstand that kind of sun for up to three years, and we back it with a one-year free re-restoration guarantee.
How to Prevent Headlight Oxidation After Restoration
Prevention starts the moment your lenses are clear again. Once the factory clear coat is gone, the plastic depends on whatever protection you apply, so the goal is keeping a UV barrier in place continuously.
A few habits extend the life of a restoration:
- Reapply a UV protectant periodically if you used a basic sealant rather than ceramic.
- Park in shade or a garage when you can, since sun exposure drives oxidation.
- Wash headlights with the rest of the car to remove road film before it bonds.
- Avoid abrasive cleaners that strip protective coatings.
- Inspect the lens surface every few months for early signs of hazing.
If you notice a faint haze returning, address it early. Light polishing and a fresh coat of sealant at the first sign of dulling is far easier than a full re-sand later.
Common Mistakes to Avoid When Clearing Foggy Headlights
Most failed restorations trace back to a handful of avoidable errors. Fix these and your results last dramatically longer.
- Skipping the sealant. Sanding and polishing without UV protection leaves bare plastic that re-oxidizes fast.
- Sanding dry. Dry sanding clogs the paper and scratches the lens. Always keep the surface wet.
- Skipping grits. Jumping from coarse to fine leaves visible scratches that polishing can't remove.
- Working in direct sun. Heat makes compound dry out and plastic behave unpredictably. Work in shade.
- Using the wrong polish. Household abrasives can be too aggressive for polycarbonate.
- Not taping off trim. One slip with sandpaper scuffs paint that costs far more to fix than the restoration itself.
A common mistake is treating restoration as a one-time job. It's a maintenance cycle. The drivers who get years out of their headlights are the ones who protect the surface, not just clear it once.
Conclusion
The reason most headlight restorations fail isn't technique. It's the missing UV sealant that leaves freshly cleared plastic exposed to the same sun that ruined it the first time. Get the sanding, polishing, and sealing right, and the clarity holds.
If you'd rather skip the labor and the guesswork, Colorado Headlight Restoration brings the full process to your home or office. Our mobile service restores cloudy, yellowed lenses to OEM clarity in 30 to 60 minutes, finishes with a ceramic UV sealant built to last up to three years in high-altitude sun, and includes a one-year free re-restoration guarantee. You get the clarity without the driveway project.
Frequently Asked Questions
Is it possible to permanently clear foggy headlights?
Yes, if you restore the lens and seal it with a UV-blocking coating. Foggy headlights come back because oxidation returns once the factory UV layer is gone. Wet-sanding and polishing removes the damaged plastic, but without a sealant the lens will yellow again in months. A ceramic UV sealant creates a protective barrier that blocks the sun's ultraviolet rays, which is what makes the results last. Professional services that include a ceramic sealant typically protect lenses for up to three years.
Why do headlights get foggy again after cleaning?
Most DIY kits and toothpaste hacks only polish the surface. They remove the visible haze but leave the plastic exposed to UV radiation, road chemicals, and temperature swings. Within weeks, oxidation begins again. The key to lasting results is applying a UV-blocking sealant immediately after polishing. Without that step, you're just temporarily clearing the lens, not protecting it.
What is the best UV sealant for restored headlights?
Ceramic coatings designed for automotive clear plastics outperform wax, clear coat sprays, and standard polishes. A quality ceramic coating for headlights bonds to the plastic and blocks UV rays, which is the main cause of re-oxidation. Look for a product specifically formulated for polycarbonate lenses. Professional restoration services that include ceramic UV sealant typically guarantee protection for up to three years, even in high-altitude sun.
Is it better to restore headlights or replace the assembly?
Restoration is almost always the better choice unless the lens is cracked or the housing is damaged. New headlight assemblies can cost hundreds or thousands of dollars per pair, while professional restoration typically costs a fraction of that and restores OEM clarity. Replacement also requires disassembly and recalibration on some vehicles. If the lens is structurally intact, restoration delivers the same visibility improvement at a much lower cost.
Foggy headlights are a safety issue, not just a cosmetic one, and they'll keep getting worse until the oxidation is removed and sealed. Rather than spend an afternoon sanding and hoping the result holds, let Colorado Headlight Restoration handle it on-site with a professional process, a durable ceramic UV sealant, and a one-year free re-restoration guarantee. Get started with Colorado Headlight Restoration and see your headlights restored to OEM clarity without leaving your driveway.
Cloudy headlights? Get your price in 30 seconds.
Mobile service across the Denver metro. Most vehicles finished in 30–60 minutes, right in your driveway.