
Table of Contents
- Headlight Restoration vs Assembly Replacement: A Quick Comparison
- Signs Your Headlights Need Restoration or Replacement
- The Cost of Replacing Headlight Assemblies vs Restoration
- How Long Does Headlight Restoration Last?
- Professional Headlight Restoration: Process and Benefits
- When Headlight Assembly Replacement Is the Only Option
- Making the Right Choice for Your Vehicle
- Frequently Asked Questions
Last Updated: October 14, 2026
Headlight Restoration vs Assembly Replacement: A Quick Comparison
Headlight restoration vs assembly replacement comes down to one question: is the damage on the lens surface, or inside the housing? Surface oxidation, yellowing, and cloudiness respond well to professional headlight restoration. Cracks, internal condensation, and broken mounting tabs mean you need a new assembly. At Colorado Headlight Restoration, we have restored thousands of lenses across the Denver metro area, and the split is usually clearer than drivers expect.
Headlight restoration is the process of sanding, polishing, and sealing the outer lens to remove oxidation and restore clarity. Headlight assembly replacement means removing the entire housing, including the lens, reflector, and bulb, and installing a new unit.
Here is the short version:
| Factor | Restoration | Assembly Replacement |
|---|---|---|
| Best for | Surface oxidation, yellowing, haze | Cracks, water ingress, internal damage |
| Typical time | 30-60 minutes | Hours to days |
| Cost | A fraction of replacement | Hundreds to thousands per side |
| Result | Near-OEM clarity | Factory-new condition |
| Longevity | Up to 3 years with ceramic sealant | Years, until the new lens oxidizes |
Most drivers who call us assume they need new assemblies. They usually do not.
Signs Your Headlights Need Restoration or Replacement
The location of the damage tells you which service you need. Run through this checklist before you spend anything:
- Yellowed or cloudy lens surface → restoration
- Faint scratches you can feel with a fingernail → restoration
- Haze that clears slightly when wet → restoration
- Visible cracks in the lens → replacement
- Moisture or droplets inside the housing → replacement
- Condensation that returns after drying → replacement
- Dim output even after polishing → replacement (the reflector has failed)
A quick test: run your hand across the lens. If the roughness is on the outside, a restoration will fix it. If the lens feels smooth but still looks cloudy, the problem is inside the housing, and no amount of polishing will help.
The Cost of Replacing Headlight Assemblies vs Restoration
The cost of replacing headlight assemblies runs into hundreds or thousands of dollars per side, depending on your vehicle. New OEM assemblies for late-model trucks and SUVs regularly land in the four-figure range for a pair. Add labor, and the total climbs fast.
Professional headlight restoration costs a fraction of that. You keep your original housings, skip the parts markup, and avoid the labor involved in removing bumpers and wiring harnesses.
What actually drives replacement cost
Four variables move the number more than anything else:
- Housing technology. A sealed halogen reflector is the cheapest to replace. Projector housings cost more. HID and LED units cost more still, and adaptive or matrix LED assemblies with integrated control modules sit at the top of the range because the electronics are not sold separately.
- OEM vs. aftermarket vs. salvage. OEM is the most expensive but matches factory beam pattern and fitment. Aftermarket is cheaper but quality varies widely. Salvage is cheapest but you inherit whatever condition the donor lens is in.
- One side or two. Replacing only the failed side is common, but a new lens next to a 10-year-old oxidized lens looks mismatched and can throw uneven light. Many owners end up replacing both.
- Labor and calibration. Some vehicles require bumper removal to access the housing. Vehicles with adaptive or auto-leveling systems often need a calibration step after installation so the beam aims correctly.
What restoration actually costs
Restoration is priced by the pair, not the side, and the price is driven by lens condition and the sealant used. A heavily oxidized lens takes more sanding stages than a lightly hazed one. A ceramic UV sealant adds cost over a basic wipe-on protectant but is the difference between months and years of clarity.
| Cost Factor | Restoration | Replacement |
|---|---|---|
| Parts | None | New assembly per side |
| Labor | 30-60 minutes | 1-3 hours per side |
| Alignment | Not required | Often required |
| Calibration | Not required | Required on adaptive/auto-leveling systems |
| Disposal | None | Old assemblies |
| Total | Low, one-time | High, per side |
Total cost of ownership, not just upfront price
The honest comparison is not sticker price versus sticker price. It is cost per year of clear light.
A restoration with a quality ceramic sealant typically holds clarity for up to three years. Divide the restoration price by three and that is your annual cost. A replacement assembly lasts years, but the new lens will eventually oxidize just like the old one did, and when it does you are back to the same decision. Replacement also carries risks restoration does not: mismatched appearance if you replace one side, parts availability delays on older or low-volume models, and the possibility that the real fault was a connector or module rather than the housing.
We quote every job up front, and our pricing page lists current rates. No surprises when we arrive.
How Long Does Headlight Restoration Last?
How long does headlight restoration last? With a quality ceramic UV sealant, you can expect up to three years of clarity, even under intense high-altitude sun. Without a proper sealant, most DIY restorations haze over within a few months.
That gap is the whole game. Sanding and polishing removes the oxidized layer, but it also strips what is left of the factory UV coating. If you do not replace that protection, the sun starts attacking the bare plastic immediately.
Our process finishes with a ceramic UV sealant built to handle the UV load and temperature swings we get along the Front Range. We back it with a one-year free re-restoration guarantee. If the clarity fades inside that window, we come back out and redo it at no charge.
Professional Headlight Restoration: Process and Benefits
Professional headlight restoration is a multi-stage wet-sand, polish, and seal process performed on your vehicle. It takes 30 to 60 minutes per pair and requires no removal of the bumper or housing.
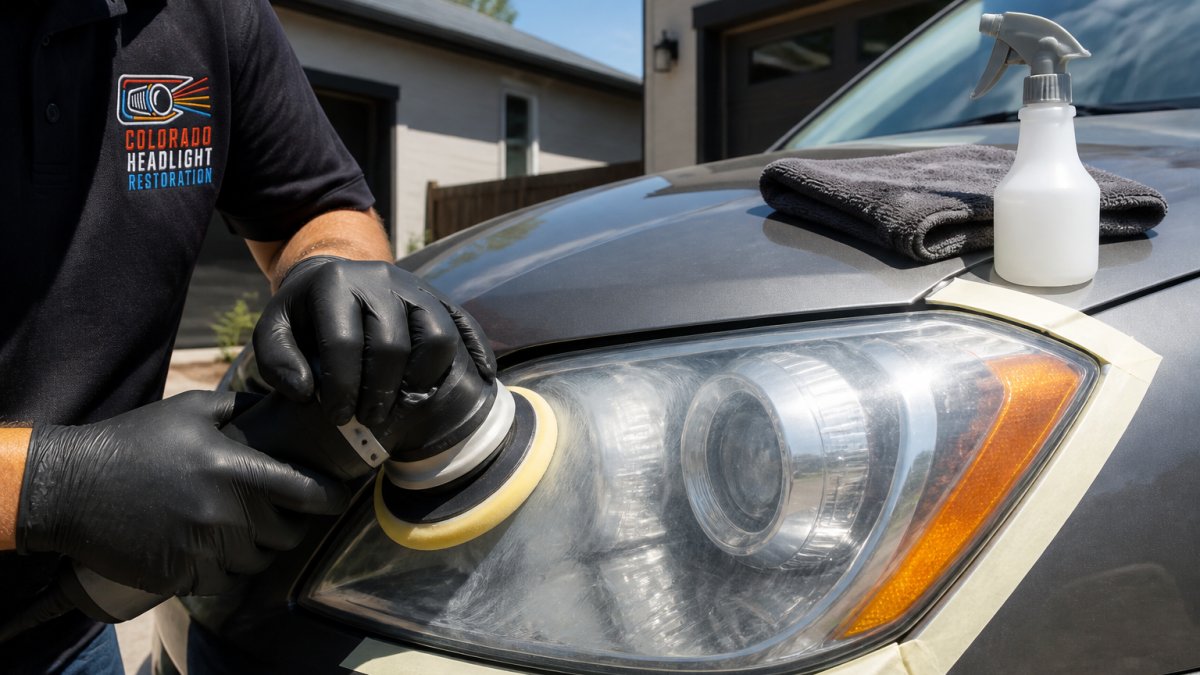
Here is what the process looks like:
- Clean and mask the lens and surrounding paint
- Wet-sand through progressively finer grits to strip oxidation
- Polish the lens back to optical clarity
- Seal with a ceramic UV coating
- Verify beam pattern and output before we leave
The benefits go beyond looks. Clear lenses throw a proper beam pattern, which matters for night driving and for meeting headlight clarity requirements at inspection. Our mobile service comes to your home or office, so you do not lose a day at a shop.
When Headlight Assembly Replacement Is the Only Option
Headlight assembly replacement is the right call when the damage is structural or internal. Restoration only addresses the outer lens. Anything behind it needs a new housing.
Replacement is unavoidable when:
- The lens has cracks or holes that let water in
- Internal condensation keeps returning after drying
- The reflector bowl has burned or clouded
- Mounting tabs or brackets are broken
- An LED or projector module has failed
- The housing has impact damage from a collision
Why modern headlights change the decision
On older vehicles, a headlight was a lens, a reflector, and a bulb socket. You could sometimes separate the lens from the housing and replace just the lens. That is rarely true now.
- Sealed assemblies. Most modern housings are permanently sealed. The lens is bonded to the housing, so there is no separate lens part to order. If the lens is cracked, the whole assembly is the part.
- Integrated electronics. LED and HID units often have the driver, ballast, or control module built into the housing. When those fail, the assembly is the serviceable unit.
- Adaptive and matrix systems. These use motors and sensors to steer or shape the beam. The components are matched to the housing and are not sold individually.
- Calibration requirements. Vehicles with adaptive headlights, auto-leveling, or camera-based systems often need a calibration or aiming procedure after installation. Skipping it can leave the beam aimed wrong even though the hardware is fine.
Diagnose before you buy
A surprising share of 'failed headlight' calls turn out to be something other than the housing. Before committing to a replacement, rule out:
- A blown bulb or failed LED driver that can be replaced on its own
- A corroded or loose connector at the back of the housing
- A blown fuse on the headlight circuit
- A body control module fault throwing a headlight code
A quick scan for diagnostic trouble codes and a visual check of the connector and wiring will tell you whether you are looking at a housing problem or an electrical one. If it is electrical, replacement will not fix it.
If your vehicle uses one of these systems, get a quote before committing. Sometimes the diagnosis points to a connector or module rather than the housing itself.
Making the Right Choice for Your Vehicle
Surface damage means restore. Structural or internal damage means replace. That is the decision tree, and it holds for a 2008 Civic and a 2026 pickup alike.
If your lenses are yellowed, hazy, or scratched on the outside, restoration gets you near-factory clarity for a fraction of the cost of new assemblies. If you see cracks, trapped moisture, or dead electronics, replacement is the honest answer, and we will tell you so.
For drivers along the Front Range dealing with oxidation from sun and altitude, professional headlight restoration is almost always the smarter spend. It improves your nighttime visibility, protects your resale value, and costs far less than a pair of new housings.
Frequently Asked Questions
Is it better to restore headlights or buy new ones?
Restoration is usually the better choice when the lens is cloudy or yellowed but the housing and electronics are intact. It costs a fraction of replacement and takes under an hour with professional service. Choose replacement only if the lens is cracked, the reflector is damaged, or moisture has corroded internal components. A professional can diagnose which option fits your vehicle.
How much does it cost to replace a headlight assembly?
The cost of replacing headlight assemblies varies widely by vehicle make and model, assembly type (OEM vs aftermarket), and labor rates. Some assemblies cost a few hundred dollars, while advanced LED or adaptive units can exceed a thousand. For an accurate estimate on your specific vehicle, check with a local shop or your dealer.
How long does professional headlight restoration last?
With a quality ceramic UV sealant, professional headlight restoration can last up to three years, even in high-altitude sun. Without a protective top coat, DIY kits often degrade within months. The key is the sealant: it blocks UV rays that cause oxidation. Regular washing and occasional waxing help extend results.
When should a headlight assembly be replaced instead of restored?
Replace the assembly when the lens is cracked, the housing is broken, or internal condensation has damaged the reflector or bulb socket. Also replace if the beam pattern is distorted after restoration attempts. Restoration works for surface oxidation only. If light output remains poor after polishing, the assembly itself is the problem.
Can I restore my headlights myself or should I hire a professional?
DIY kits can improve mild cloudiness, but they often lack a durable UV sealant, so results fade quickly. Professional headlight restoration includes wet sanding, polishing, and a ceramic coating that lasts years. If you want long-term clarity and safety, a professional service is worth the investment.
Dealing with cloudy, yellowed headlights that dim your view of the road? Colorado Headlight Restoration brings the fix to your driveway or office parking lot, with a 30 to 60 minute process, a ceramic UV sealant rated for up to three years, and a one-year free re-restoration guarantee. Get started with Colorado Headlight Restoration and see the road clearly again.
Learn more about our headlight restoration in Denver, or see headlight restoration in Longmont.
Cloudy headlights? Get your price in 30 seconds.
Mobile service across the Denver metro. Most vehicles finished in 30–60 minutes, right in your driveway.